
This tutorial involves four key components: WordPress, WooCommerce, the Autoship Cloud plugin, and custom coding. This tutorial shows you how to build this site on your own using these pieces. The Autoship Cloud plugin is a great repeat order and subscription plugin, but the following example is coded on top of it.


We’ve crafted this step by step guide to walk you through the steps and code to create a site just as dynamic as those already out there using the flexibility of WordPress, power of WooCommerce, and automation of Autoship Cloud, all without needing the customer to go through a checkout to create a subscription!
What We’re Creating
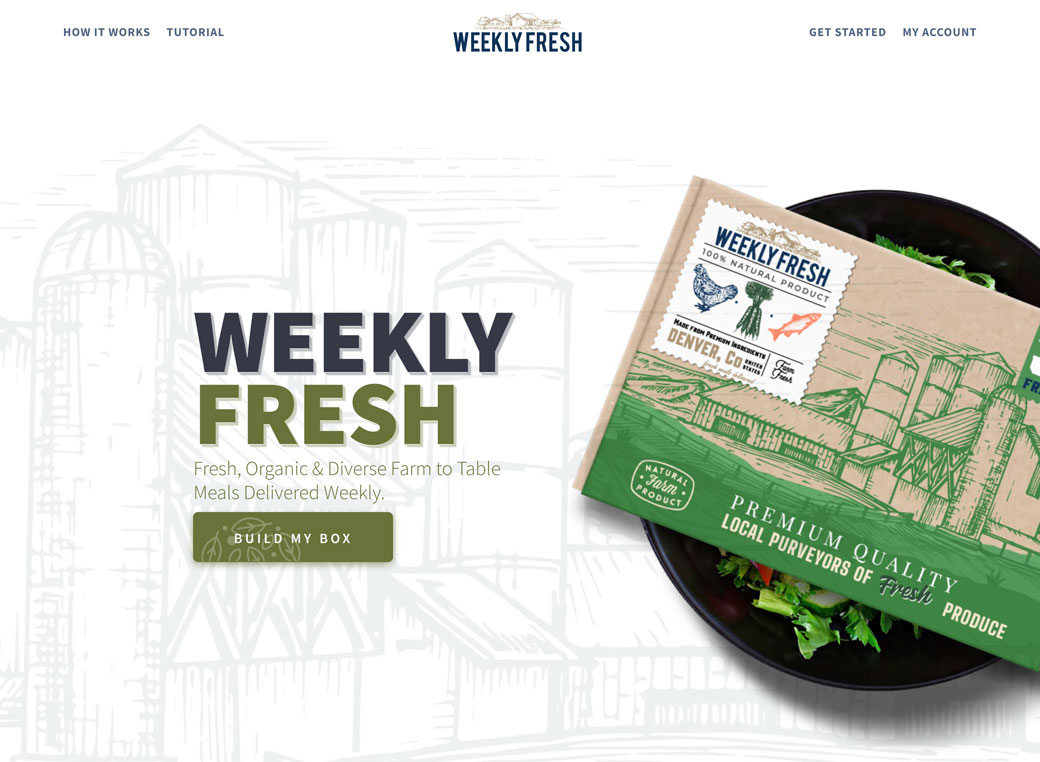
As a Cloud Based Engine for all things Scheduled, QPilot has seen a lot of different types of shipped products being turned into Subscriptions, from CBD and Hemp products, to Vitamins, Pet Food and Healthcare products. However, we get asked quite often how ( and is it possible ) to create a meal subscription site like HelloFresh, Blue Apron, Daily Harvest or Freshly but do so without having to charge the customer when they place their subscription. Yes, it is possible! Not only is it possible but we’ll walk you though all the code, steps and components you need to create it… you can even demo the site we’ll create together and see for your self!
Flexible Plans, A Dynamic Cart, Recurring Payments, Generated Scheduled Orders, and All Without a Checkout!
Follow our tutorial and allow your customers to fill a box with tasty meals, schedule that box to be auto shipped monthly, weekly, or even daily ( Wow talk about fresh! ), add a billing and shipping address, and even add a saved payment method to be charged when the first order actually ships. In the next few chapters we’ll be covering the following main key areas, diving into depth within each and walking through the details with the end result being your own Meal Box Subscription Site. If you already walked through our tutorial on creating a meal subscription site using the WooCommerce checkout, Great!, then you’ve seen a lot of what we’ll cover below, however there are quite a few differences so keep that in mind as we walk through the steps. If you haven’t read our other tutorial be sure to check it out!
Box Sizes & Schedules
There are four main parts to all Meal Box Subscription sites ( other than the actual food ), the Box Size, the Shipping Schedule, the Shipping & Billing Address, and finally the Saved Payment Method ( the last two are typically taken care of by the checkout ). We’re going to start our tutorial with Box Sizes & Delivery Schedules, and after which we’ll move on to the next three focus areas.
Box Sizes & Delivery Schedules
View Step 1 SummaryCustomer Journey
View Step 2 SummaryCart Requirements
View Step 3 SummaryCreating the Scheduled Order
View Step 4 SummaryDid You Know?
Scheduled Orders are almost always for physical items that need to be shipped on a regular basis, ranging from Pet Products like with Petco, to Health and Beauty Products like philosophy, and even home goods like with Amazon’s Subscribe and Save. Unlike a typical subscription ( and even most Scheduled Order services ), Scheduled Orders created with Autoship Cloud powered by QPilot are similar to a cart in that they can be edited on the fly by the customer ( adding items, removing items, changing the order’s schedule, etc. ) before each scheduled shipment. The Best Part…it’s all built in with our customer centric Scheduled Order management system.
Pre-Requirements
Here are several components that you’ll need to install / setup before starting this project.
Install & Configure Storefront ( a free WooCommerce theme ) though you could use any theme you choose.
Install & Configure WooCommerce
Install & Configure Stripe or another a supported Payment Gateway ( See all our supported payment gateways here )
Install & Configure Autoship Cloud powered by QPilot ( Sign up for a free test account here )
Create & Enable Several Products for Autoship ( See our setup docs here )
Box Sizes & Schedules
Managing the Customers Plan / Selected Box Size
As with all Meal Box Subscription services there’s a Box size, meaning a number of meals that will be included in each shipment, and a Schedule, how often will the shipment be shipped. We’re going to offer three different Plans or Box Sizes in our demo site, a 2 Meal Fresh Box, a 3 Meal Fresh Box, and our default 5 Meal Fresh Box. This means that based on the Plan the customer chooses, they must have 2, 3, or 5 Meals in their cart ( different or the same item ) before they can checkout.
Since we now have our Plan sizes specified we’ll need to store the assigned plan somewhere so that we can retrieve it when running our cart validations later on. We’re going to store our Plan value in a custom xx_fresh_box_plan User Metadata record.
Managing the Customers Plan Step 1
Retrieve Available Plans
The first function we’ll need to create is one that tells us the available plans to pick from. Create a new xx_get_user_plans() function which returns an array of available plans. We’re going to start with three plans ( through you could start with however many & sizes that fit your business ), a 2 Meal Fresh Box, 3 Meal Fresh Box, and a 5 Meal Fresh Box.
- 2 Meal Fresh Box
- 3 Meal Fresh Box
- 5 Meal Fresh Box
Managing the Customers Plan Step 2
Assign a Plan to a Customer
The second function we’re going to create is the xx_add_plan_to_user() function, which I’m sure you can guess will be used to add / assign a plan to a customer. The new function should take two optional integer parameters, ( $user_id ) and ( $plan ). The first step in the function is to check if the user id was supplied and if not use the WordPress get_current_user_id() function to retrieve the id of the currently logged in user.
The second part of the function will be to update the user’s custom xx_fresh_box_plan metadata record with the supplied plan value using the WordPress update_user_meta() function.
Managing the Customers Plan Step 3
Retrieve a Customer’s Plan
The last function we’re going to create is a xx_get_user_plan() function which will return the current plan assigned to a customer. The new function should take one optional integer parameter ( $user_id ) and return an integer. Just as we did with the first function, if a user id isn’t supplied, the user id will be retrieved using the get_current_user_id() function. Then use the WordPress get_user_meta() function along with the user id to retrieve the plan assigned to the user. In this case we’re going to default the plan to the plan we prefer our customers select when they haven’t selected a plan yet, our 5 Meal Fresh Box.
NOTE While we’ve added functions to set and get the plan assigned to a user, we’ll be adding the form our customers will use to select their plan later on.
We’ve added ways to assign a plan to a customer, and retrieve the plan, but what about the cart? Our plan does equate to box size and box size determines how many meals our customers can add to their carts. We’ll get into the cart validation a bit later, however, we’re going to create a cart utility function ( while plans are fresh in our minds ) to help make our lives a bit easier going forward and to help save some keystrokes. The function pairs the xx_get_user_plan() function from above directly to the cart size.
Customer Plan Utility Function
Compare Selected Plan to Current Cart Quantity
Create a new xx_get_cart_diff() function which will take an optional $quantity parameter and returns the difference between the current cart count ( using the WC_Cart::get_cart_contents_count() method ) and the current user’s plan returned from the xx_get_user_plan() function above.
Box Sizes & Delivery Schedules
Managing a Customers Schedule
We’ve laid out what subscription box plans will be available to our customers and the functions we’ll use to manage those. The next big piece to any Meal Box Subscription service is the Schedule. Some services don’t offer choices and ship every week, while others offer options for Weekly or Monthly. We’re going to eventually offer multiple schedule options ( who doesn’t like flexibility? ) and just like those Meal Box Subscription sites we’ll need a way to save and retrieve the schedule a customer chooses.
Before getting into the functions we’ll need to manage a schedule, we’ll need to define what a schedule is and how it’s stored. Luckily, Autoship Cloud does this for us so no need to rack our brains coming up with a complex definition.
Autoship Cloud defines a schedule as a configured frequency type ( i.e. time – Months, Weeks, Days, etc. ) and frequency ( i.e. interval – 1, 2, 12, 60 etc. ) that a Scheduled Order is repeated.
Makes sense right? Given this we’re going to store our schedule as a string as {time}-{interval}, where the time portion of the string is the frequency_type ( i.e. Months, Weeks, Days, etc. ) and the interval portion of the string is the frequency.
Managing the Customers Schedule Step 1
Assign a Schedule to a Customer
The first thing we’ll take care of is assigning a schedule to a customer. Create a new xx_update_fresh_box_schedule() function, which takes an optional integer ( $user_id ) and an optional string ( $schedule ). Just like we did with the Plan functions, the first thing we’ll do is to check if the user id was supplied and if not use the WordPress get_current_user_id() function to retrieve the id of the currently logged in user.
The second part of the function ( just like we did earlier with our plan function ) will be to update the user’s custom xx_fresh_box_schedule metadata record with the supplied schedule ( the frequency and frequeny_type string ) using the WordPress update_user_meta() function.
Managing the Customers Schedule Step 2
Retrieve a Customer’s Schedule
The second function we’re going to create is the xx_get_fresh_box_schedule() function, which will be used to retrieve a customer’s schedule. The new function should take two optional parameters, an integer ( $user_id ), and a boolean ( $components ). Once again, Just as we did with the other functions, if a user id isn’t supplied, the user id will be retrieved using the get_current_user_id() function. Then use the WordPress get_user_meta()function along with the user id to retrieve the schedule assigned to the user. The last part is where the Boolean comes into play. As we mentioned earlier the schedule is stored as a string {frequency_type}-{frequency}, though in a future step we will need to get each individual component separately so that we’ll be able to assign them to the cart items. If the optional Boolean parameter is set to true, use the PHP explode() function to return the value as an array, with two keys frequency_type and frequency.
NOTE Just like with our plan functions, while we’ve added functions to set and get the schedule for a user, we’ll be adding the form our customers will use to select their schedule later on.
Customer Addresses & Saved Payment Method
Managing the Customers Address and Saved Payment Method(s)
Just like the Plan and the Box Size, knowing where to ship the meals and a way the customer can pay for a meal is just as important. Typically, the customer would enter their address and payment information at checkout. However, what happens if the customer isn’t actually buying anything yet, if the meal isn’t going to ship until next week or next month, should they really be making a payment now? This is where our checkout-less process comes in and why we need to work through getting, saving, and managing a customers address and payment information separate from a checkout.
Managing the Customers Address and Saved Payment Method(s) Step 1
Check if a Customer has a Shipping and/or Billing Address
The first function we’re going to create is one that tells us if a particular customer has a valid Shipping Address, Billing Address, or both. Luckily, WooCommerce already provides us with the methods we need to know which Address fields are required and get that information from the customer’s saved info. Create a new xx_user_has_required_address_vals() function which takes an optional string ( $type ) as the sole parameter and returns a boolean.
The first step in the function is to retrieve the current user’s id using the WordPress get_current_user_id() function and then retrieve the Customer object for this user using the WooCommerce Customer class WC_Customer(). Once we have the new customer object we can use the WC_Customer::get_billing() and WC_Customer::get_shipping() methods to retrieve the current user’s address information.
The second part of the function will be to retrieve the fields typically required for a customer to checkout. In this scenario, WooCommerce once again offers a Checkout Class we can use to do this. Create a new instance of the WC_Checkout() then use it’s WC_Checkout::get_checkout_fields() method to retrieve an array of checkout fields.
The last part of the function is to loop through the customer’s Shipping and/or Billing address fields depending on what type was supplied to our function as an argument, comparing them to the required checkout fields returned by the WC_Checkout::get_checkout_fields() method. Then return true if all the fields are populated or false if they aren’t.
Managing the Customers Address and Saved Payment Method(s) Step 2
Assign a Payment Method to a Customer
The second function we’re going to create is the xx_update_fresh_box_payment_method() function which will be used to add / assign a payment token id to a customer. The new function should take two parameters, an integer ( $user_id ), and an optional array ( $token ). The first step in the function is to check if the user id was supplied and if not use the WordPress get_current_user_id() function to retrieve the id of the currently logged in user.
The second part of the function will be to update the user’s custom xx_fresh_box_payment_method metadata record with the supplied token value using the WordPress update_user_meta() function.
Managing the Customers Address and Saved Payment Method(s) Step 3
Retrieve a Customer’s Payment Method
The last function we’re going to create is a xx_get_fresh_box_payment_method() function which will return the current payment method assigned to a customer. The new function should take one optional integer parameter ( $user_id ) and return an array. If the user id isn’t supplied, the user id will be retrieved using the get_current_user_id() function. Then use the WordPress get_user_meta() function along with the user id to retrieve the payment method assigned to the user.
Congrats! Ok so now what’s Next?
We’ve now covered the basics on how we’re going to manage our customer’s Box Sizes and Delivery Schedules along with crafing some utilty functions to help make our lives a bit easier. The Next Step is to tackly the part that makes each Meal Box Subscription site slightly different from the others, the Customer Journey!