Thanks to Amazon’s Subscribe and Save programs, your shoppers are already familiar with how to save money by subscribing to your products instead of making one-off purchases.
This means that whether you sell to consumers or businesses, now’s the perfect time to introduce subscription-based product sales and bring about predictable growth. But WooCommerce doesn’t support recurring payments in WordPress by default. To set up WooCommerce recurring payments, you need to use a WooCommerce subscriptions plugin like Autoship Cloud.
In this article, you’ll get to know how you can set up automated WooCommerce recurring payments with Autoship Cloud and convert your regular ecommerce website into one where shoppers and business customers can subscribe to their favorite products and supplies. We’ll also explain why Autoship Cloud is the best WooCommerce subscriptions plugin, and how it differs from alternatives like WooCommerce Subscriptions, YITH WooCommerce subscription, and others. Before that, let’s see why you need to switch to a subscription model for your business, or at least include subscriptions in your current sales mix. While we’re at it: Why don’t you go ahead and sign up for Autoship Cloud’s free 14-day trial? Do that and then follow these steps to set up recurring payments on your WooCommerce store.
Why should you set up WooCommerce recurring payments? What are the benefits of the subscription model?
Subscriptions are a win-win.
Subscriptions boost customer retention (and, as a result, your average customer lifetime value). If you get even a small percentage of your customers (consumers or businesses) to subscribe, they keep returning to you.
Subscriptions result in consistent sales, upsells, and cross-sales. In addition to guaranteed repeat orders, you can easily set discounts for customers to encourage upsells (like offering a 10% extra discount to consumers with a specific cart value) or cross-sells (by providing discounts to customers that subscribe to at least X products, for instance).
Subscriptions mean happier customers. When customers get to automate their essentials while scoring significant repeat discounts, it’s a natural choice to make. It’s even better when they can control their subscription experience by editing their upcoming scheduled deliveries (or even pausing or canceling them).
How to enable WooCommerce recurring payments
Over 4.4 million online stores run on WooCommerce. It’s the leading ecommerce platform, powering the operations of 28.19% of all online stores.
However, WooCommerce comes with one serious limitation: It doesn’t let you sell subscriptions on your store. It doesn’t ship with features like recurring orders, recurring payments, subscription management, and others that power an ecommerce subscription business.
But you can bring automatic recurring payments (and subscription management) to your WooCommerce store and set up a subscription-based business model with the help of the best plugins for recurring payment systems, like Autoship Cloud and WooCommerce’s official WooCommerce Subscriptions extension, among others.
In this tutorial, we’ll explore how you can add WooCommerce recurring payments to your store with Autoship Cloud. Unlike other WooCommerce subscriptions plugins, Autoship Cloud brings an entire scheduled commerce engine straight to your WordPress dashboard, in addition to powering WooCommerce recurring payments.
But first up, what exactly is Autoship Cloud?
Accept recurring payments on your WooCommerce store with Autoship Cloud
Bring end-to-end subscription management to your WooCommerce store with Autoship Cloud, the most complete WooCommerce subscription plugin. It comes with everything — right from recurring order management to (automatic) recurring billing and payment processing — you need to sell subscriptions on your store.
What is Autoship Cloud?
Autoship Cloud is QPilot’s WooCommerce subscriptions solution. Powered by the QPilot scheduled commerce engine, the Autoship Cloud plugin brings world-class automatic shipping to WooCommerce stores that sell physical products to consumers or provide supplies to vendors.
Both B2C and B2B businesses that use the subscription model to ship their products and supplies and run WooCommerce stores use Autoship Cloud to bring a complete subscription management engine straight to their WordPress dashboard.
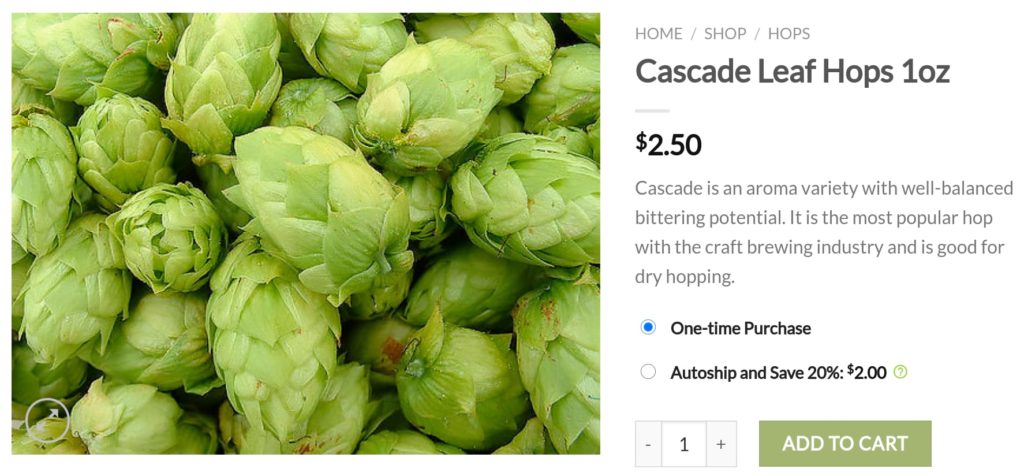
With Autoship Cloud, you can convert your simple and variable products on WooCommerce into subscriptions. It lets you offer your customers discounts for subscribing to your offerings instead of getting them as one-time purchases.
Here’s a simple WooCommerce product subscription powered by Autoship Cloud:
And here’s Autoship Cloud in action on the Cart page:
As you can see, Autoship Cloud enables you to convert your shoppers into subscribers and improves your retention rates and average customer lifetime value.
In addition to bringing WooCommerce recurring payments to your physical supplies business, Autoship Cloud also brings intelligent scheduled order management (automatically removing out-of-stock items, for instance), inventorying insights, and thorough reporting; all while offering your consumers and business customers a superb subscription experience.
Now it’s time to walk you through the exact steps needed to enable WooCommerce recurring payments for your business with Autoship Cloud.
How to use Autoship Cloud to set up WooCommerce recurring payments
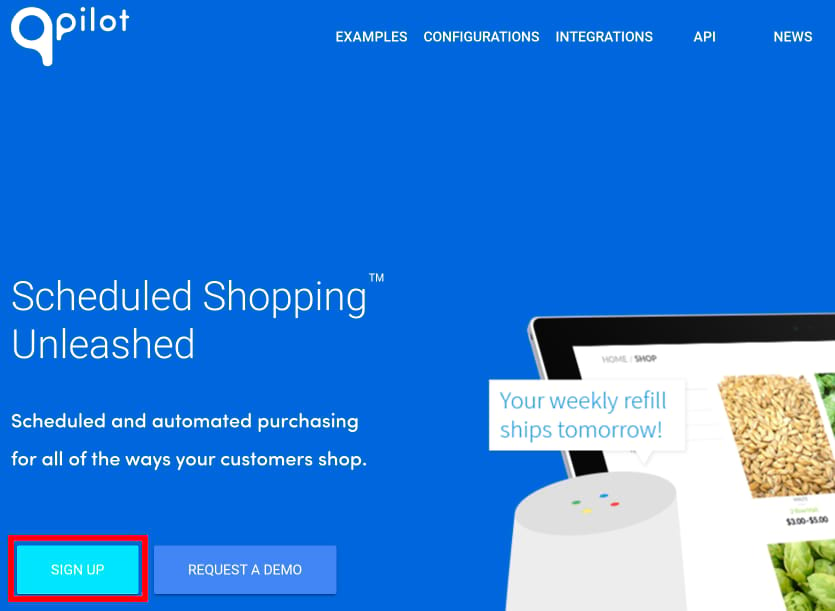
To enable WooCommerce recurring payments on your store and bring end-to-end subscription management to it with Autoship Cloud, you need to first create a QPilot merchant account.
To do so, visit Qpilot.cloud and click the SIGN UP button:
QPilot offers a 14-day free trial. When your free trial period is over, you’ll need to sign up for one of QPilot’s premium plans that start at $49/mo. This is the only investment you need to make to use Qpilot’s Autoship Cloud plugin to bring recurring payments and subscription management to your WooCommerce store. A quick tip: Reach out to QPilot’s support team, and they’ll happily offer you an additional one-month trial period extension!
To sign up for QPilot, fill the two-field sign-up form that you see and click Get Started:
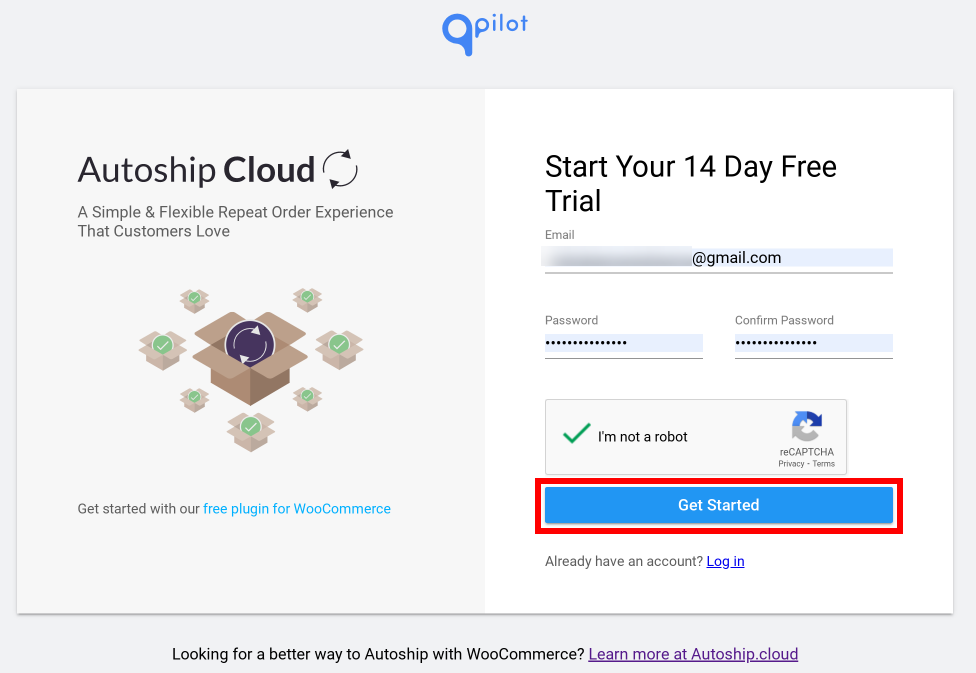
That’s it! Your QPilot account is now up and running, and you should be immediately redirected to the following login page:
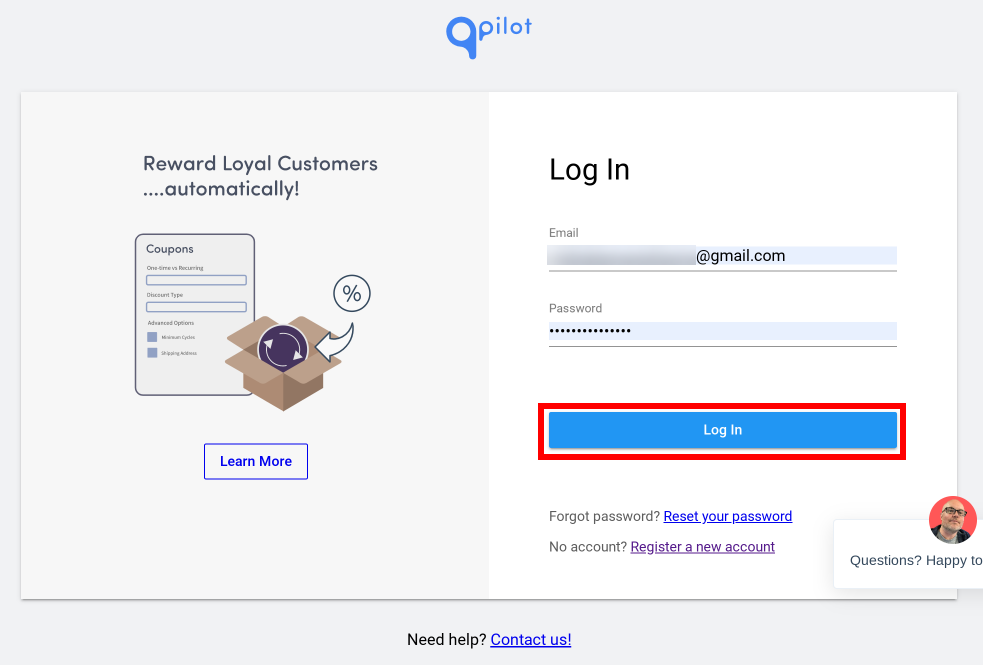
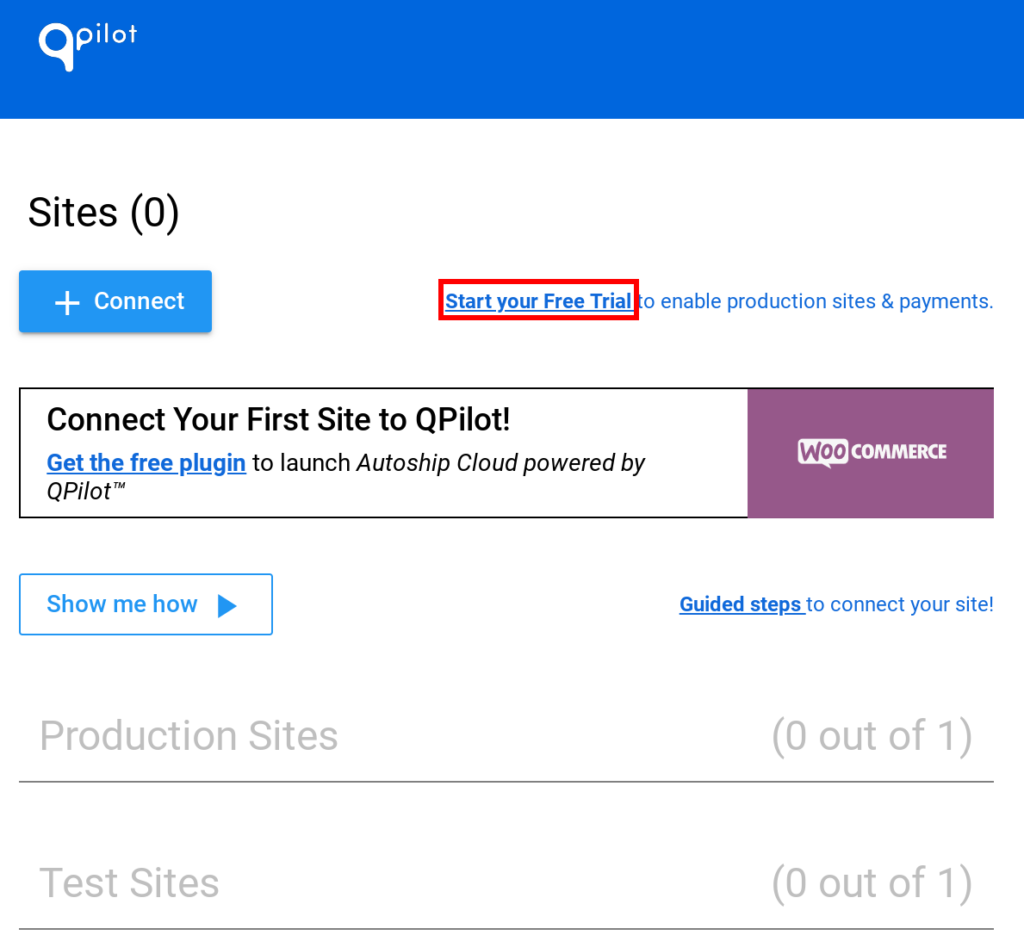
Log in and click the Start your Free Trial link:
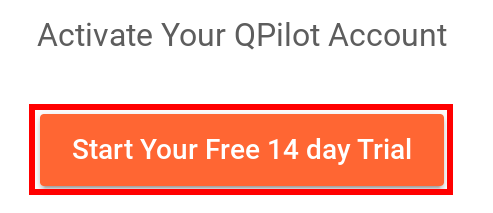
Next, click the Start Your Free 14 day Trial button to activate your free trial:
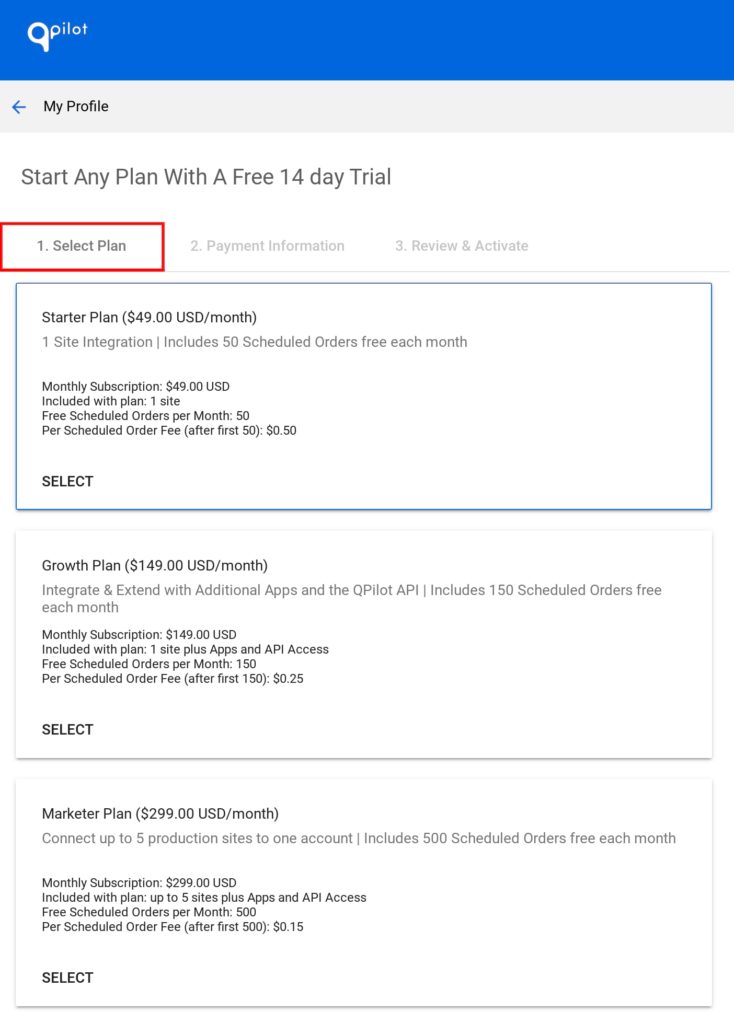
Now choose a plan that suits your needs and click Select Plan:
For this tutorial, let’s go with the Starter Plan. This plan suffices for most new and growing businesses.
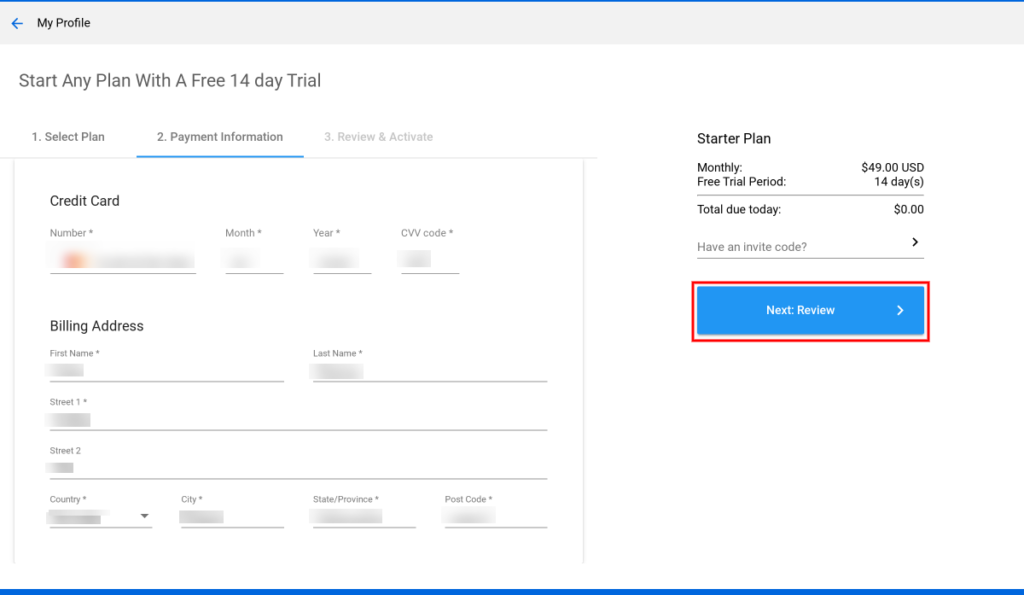
After choosing your subscription plan, enter your credit card details and click the blue Next: Review button:
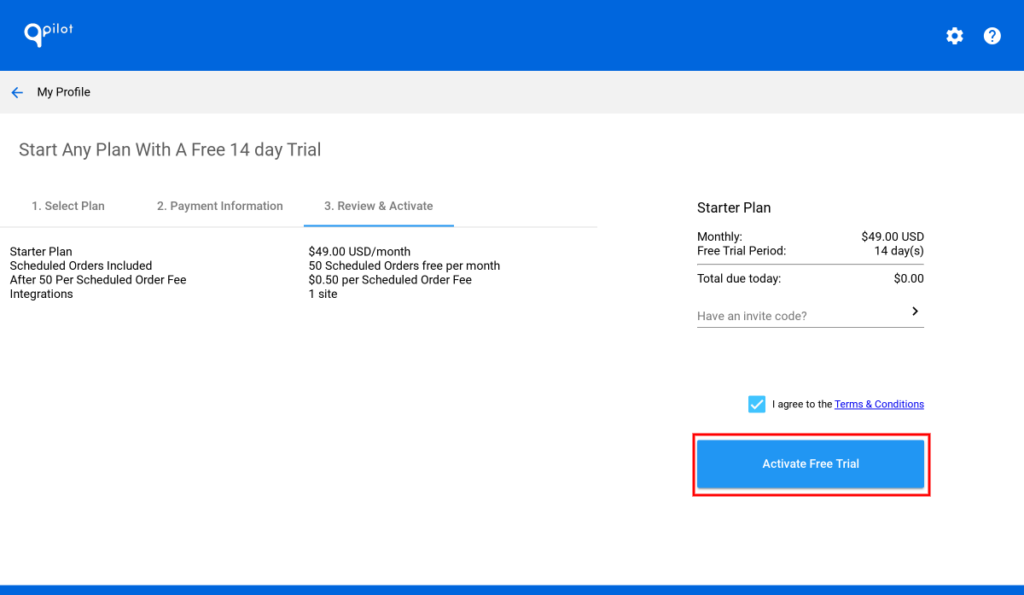
On the next screen, review your subscription’s details and click Activate Free Trial:
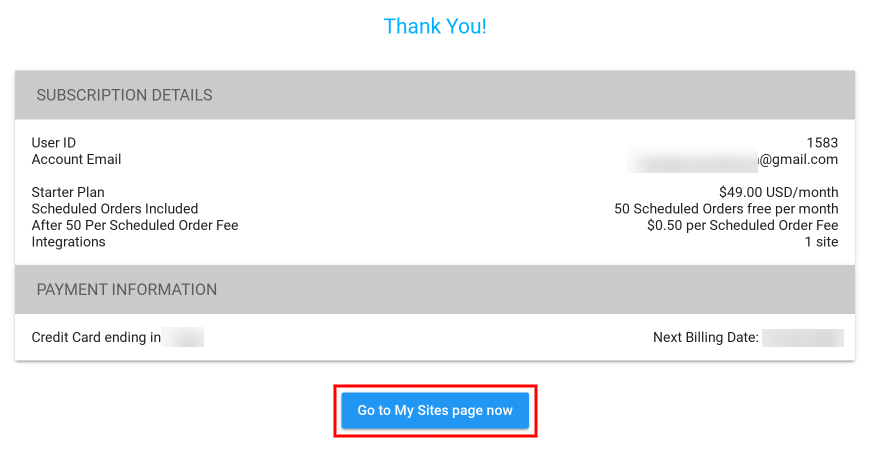
You should now see a “Thank You!” message on the next screen, along with a summary of your QPilot account’s subscription details, including your subscription’s pricing. You can also know when you’ll be charged after your two-week free trial ends. On this page, click the Go to My Sites page now button:
You should now see the following on your screen showing that your account is active:
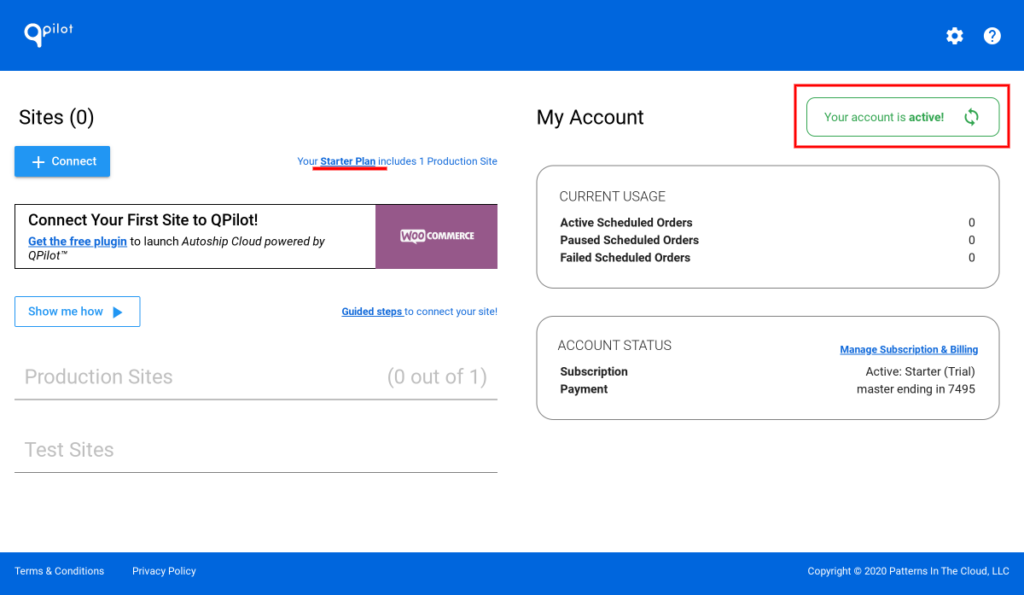
Keep this tab open in your browser; we’ll return to it later.
Now open a new tab to access your WordPress dashboard, as we need to install QPilot’s Autoship Cloud plugin on it.
(Click here if you prefer a video tutorial)
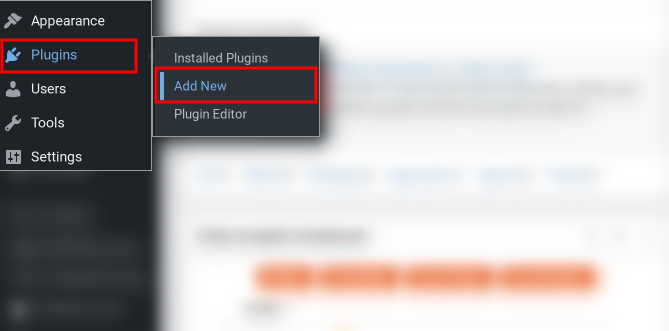
So to add the Autoship Cloud plugin, access the Plugins tab inside your WordPress dashboard, and click Add New:
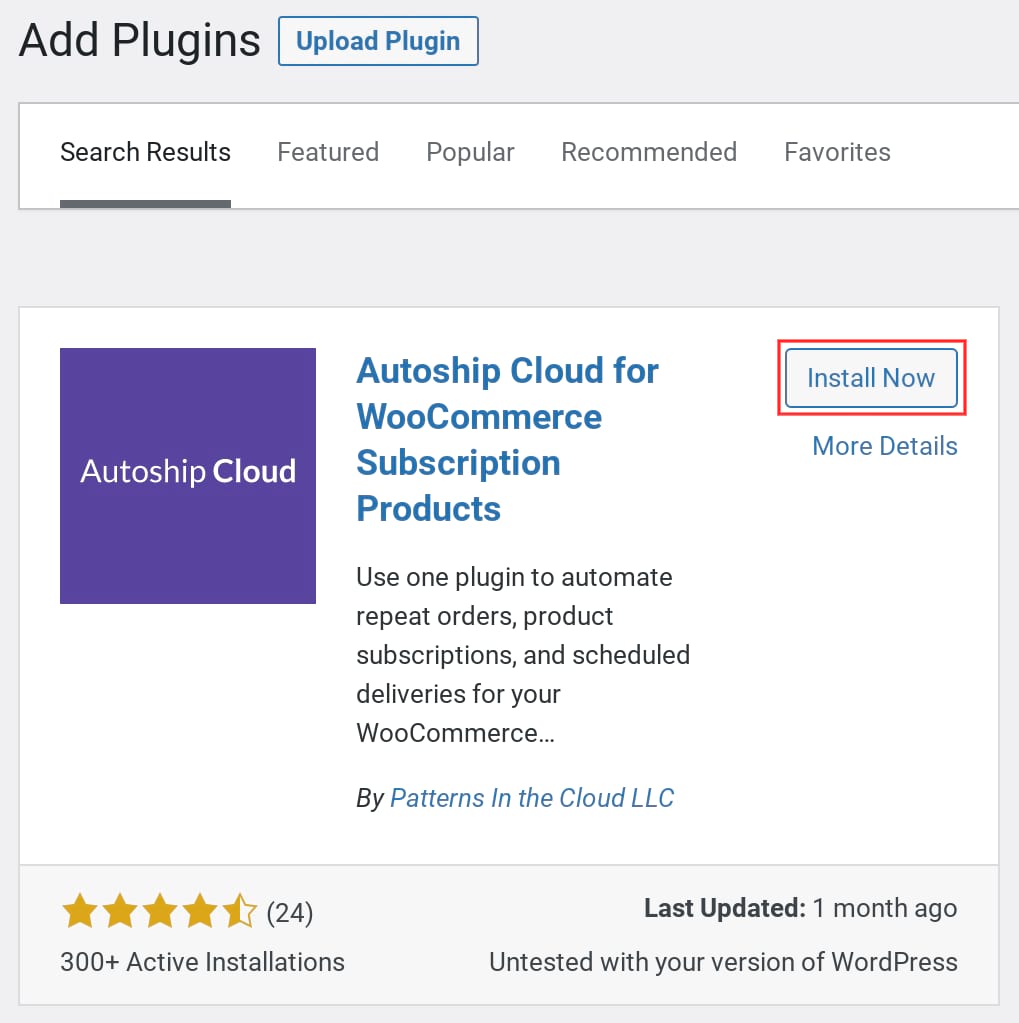
On the next screen, search for the Autoship Cloud plugin:

The plugin will show up just as you type the name; click Install Now:
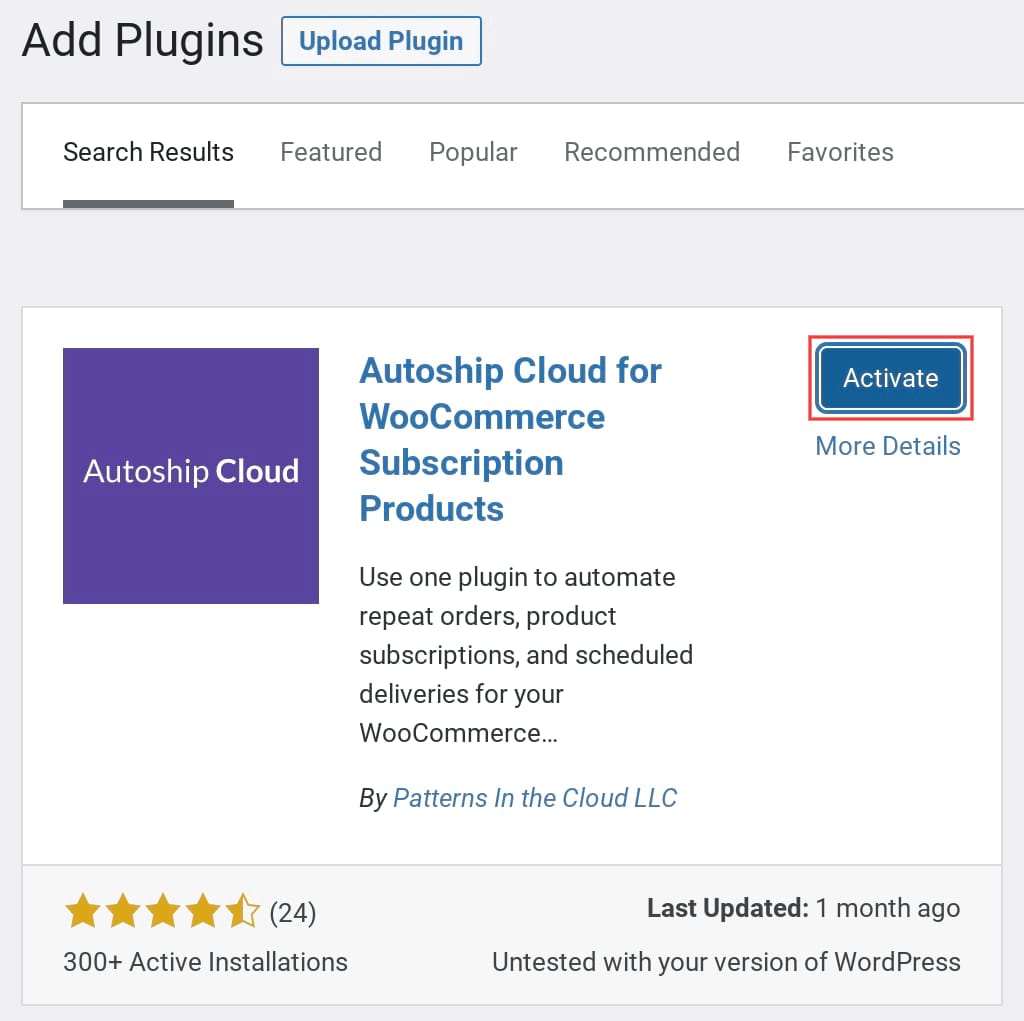
Next, click Activate:
Now that Autoship Cloud is live on your WooCommerce store, return to your QPilot dashboard, as we need to connect your QPilot merchant account with your WooCommerce store.
Click the Connect button to get started:
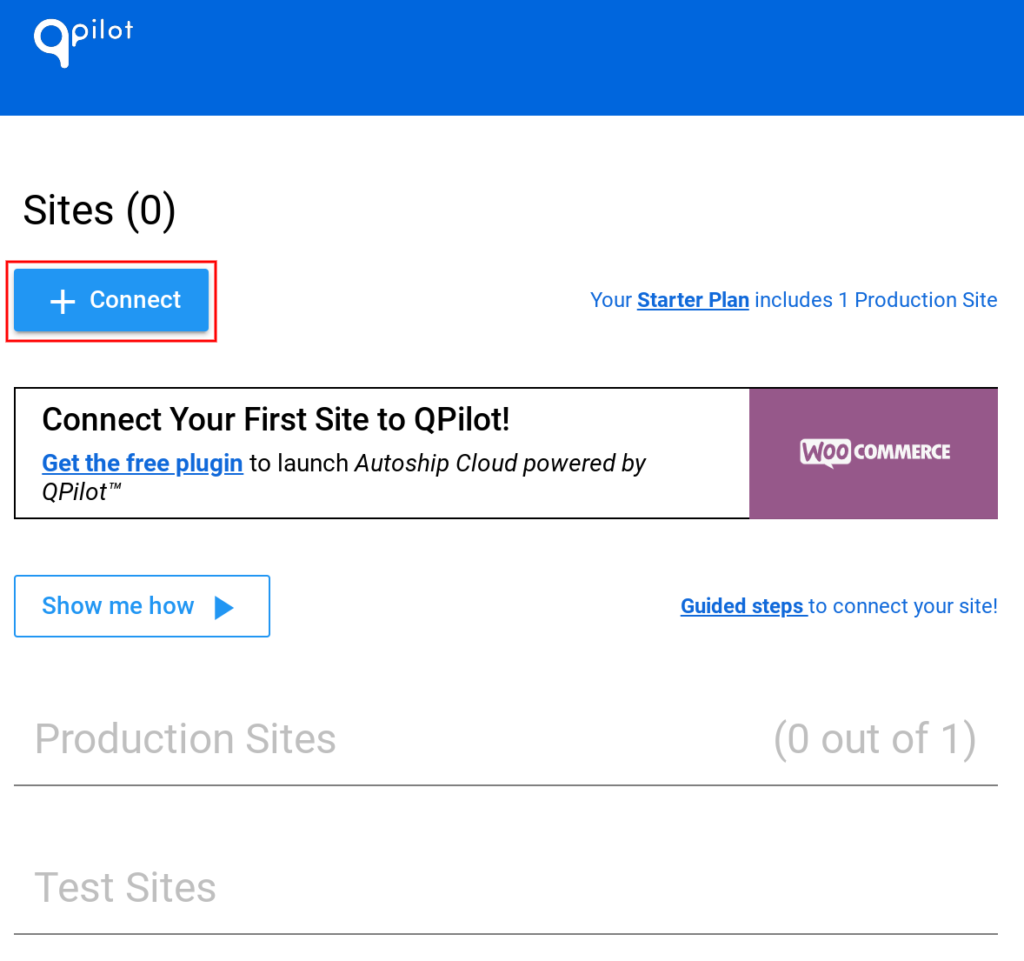
Next, click Connect on the WooCommerce app option:

On the following screen:
1. Click the top + Add Key button to generate a key.
2. Or, scroll down and click the Generate new key button.
3. Describe your WooCommerce store. For the sake of this walkthrough, let’s call your store My Autoship Cloud-WooCommerce Store.
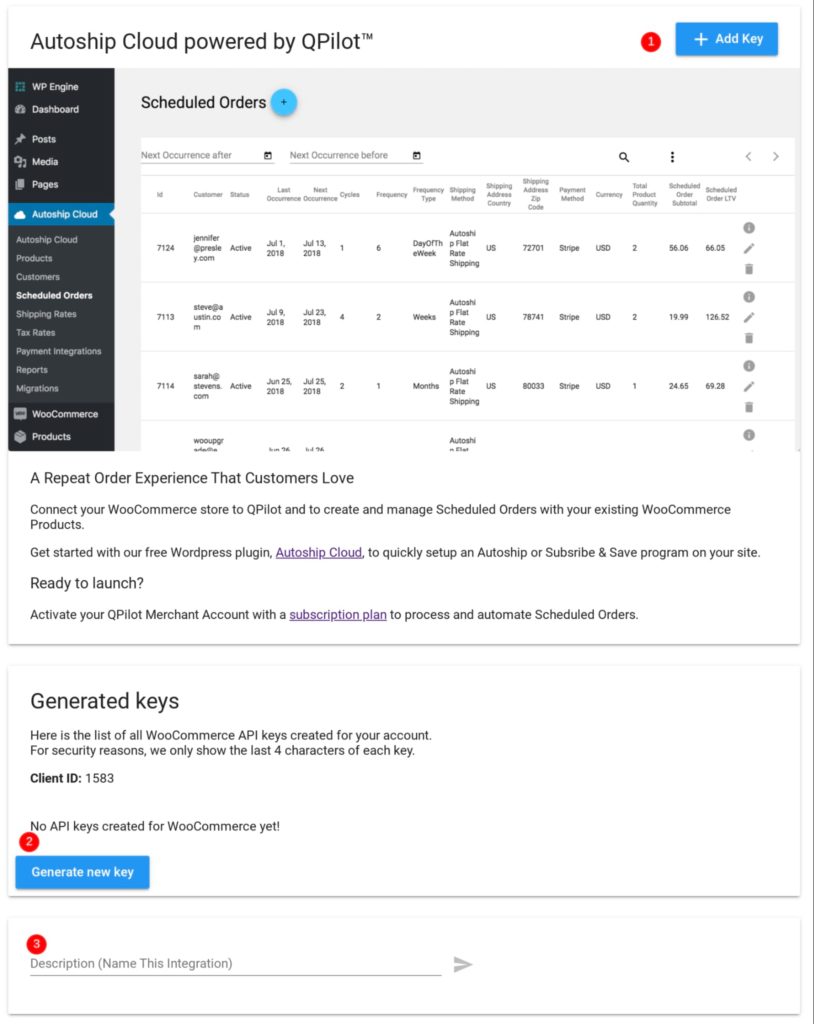
After naming the integration, click the go icon:

You should now see a key and a client ID for this setup. Copy the key and note the ID:
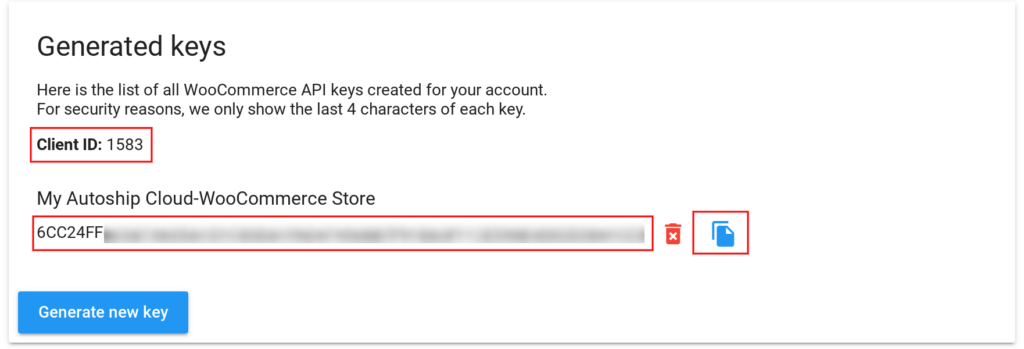
Now return to your WooCommerce store. Search for Autoship Cloud on the left panel inside your dashboard, and click Settings:
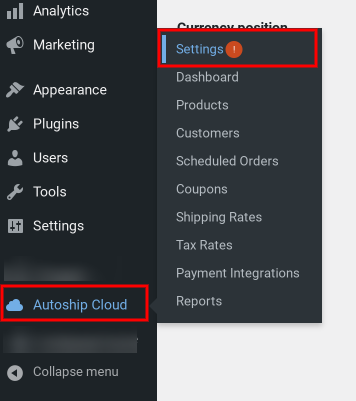
On the next screen, paste the key you copied from your QPilot merchant account and enter your Client ID, then click the Update button:
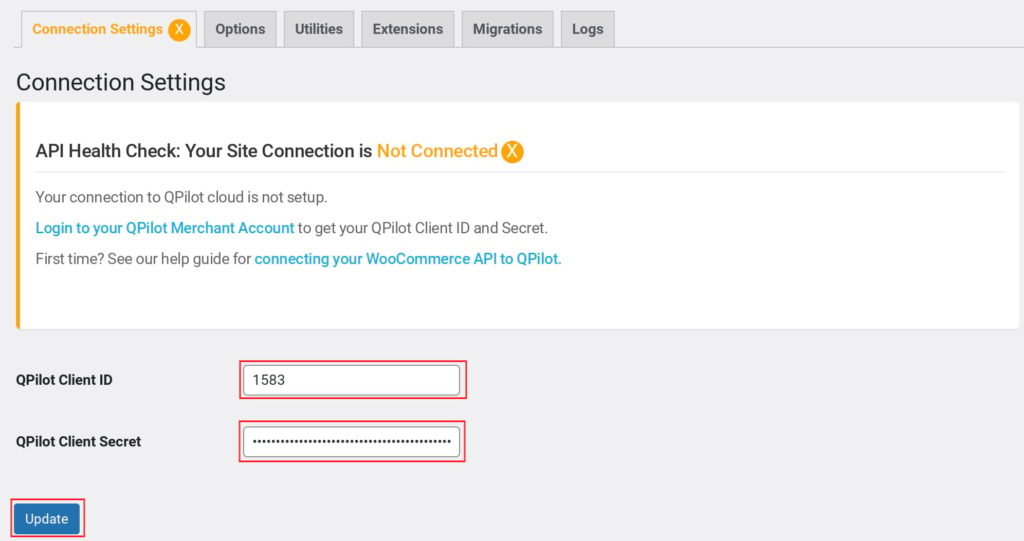
Now, click the Connect button:

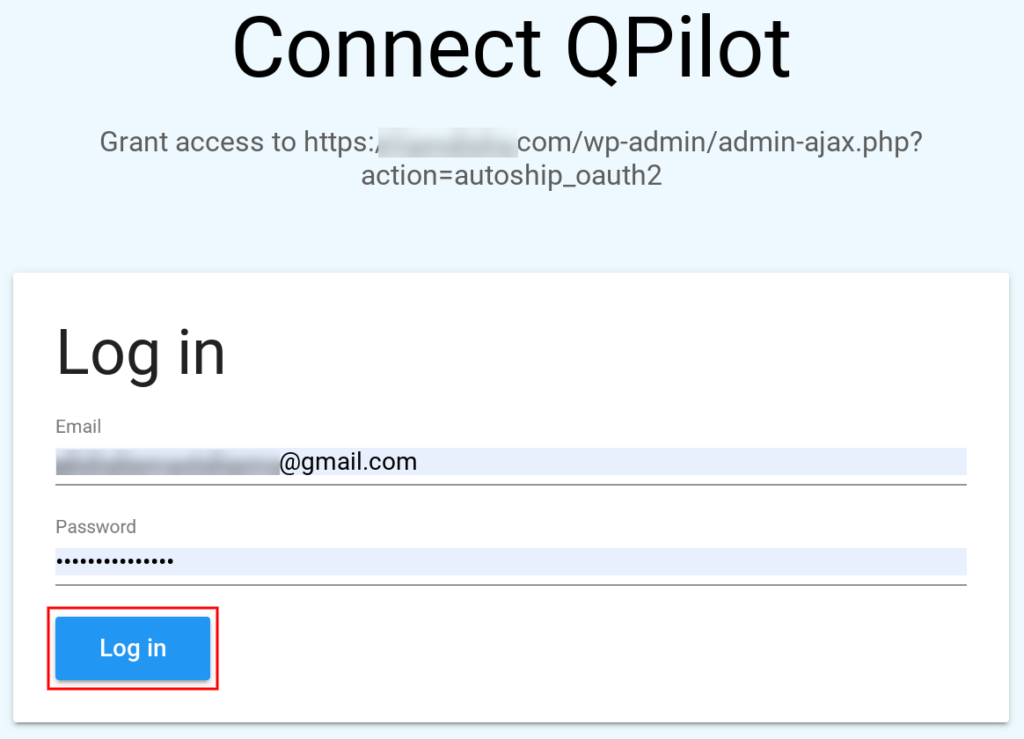
Log in to your QPilot Merchant account on the login screen that pops up:
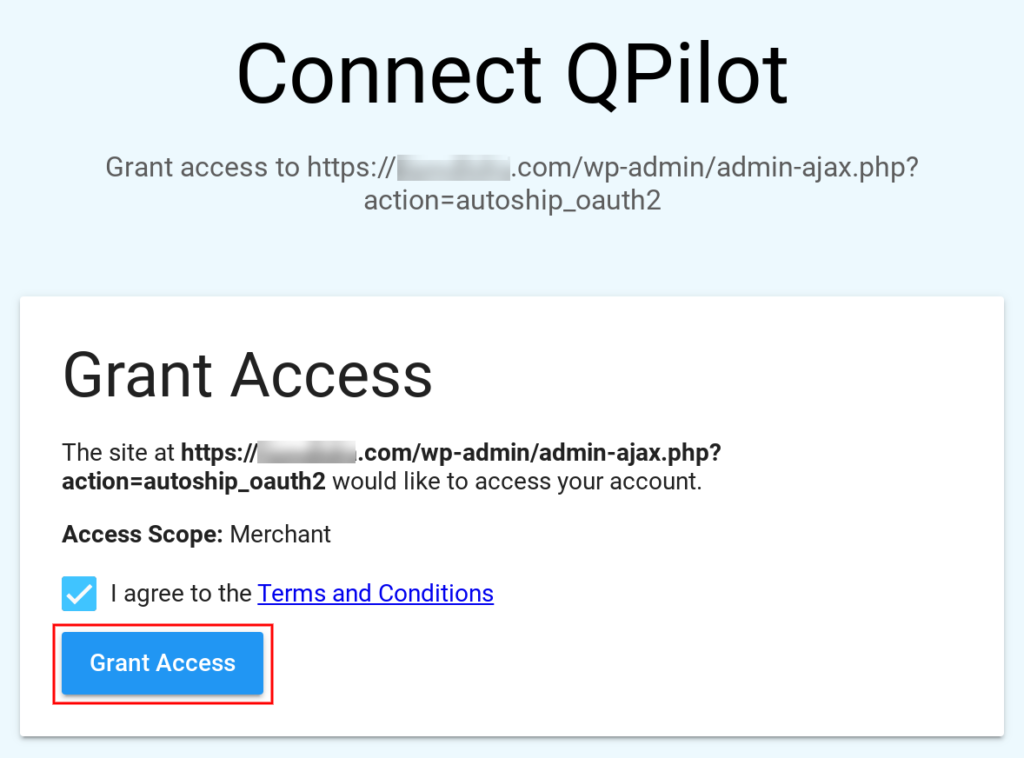
Agree to the terms and click the Grant Access button:
You should now see that your connection is set!
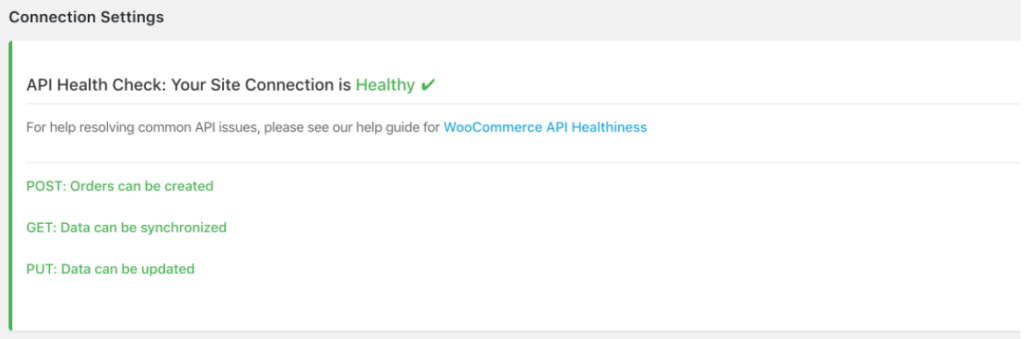
And you’re done.
The next step is to choose the products that you want to enable WooCommerce recurring payments for and sell as subscriptions with Autoship Cloud. There are three simple ways to do this. Refer to this tutorial for step-by-step instructions. The products that you set as Autoship products will now seamlessly charge WooCommerce recurring payments.
That’s all there is to it!
A few best practices:
- Ensure your WooCommerce plugin is fully set up before installing Autoship Cloud. Confirm that you have set up WooCommerce payment gateways like PayPal or Stripe and that your cart and checkout pages work well.
- Make sure there are no access or password limitations to visit your site. These can cause issues when QPilot attempts to communicate with your WooCommerce store.
- Use a staging (production/testing) site ideally before implementing Autoship Cloud on your live ecommerce store. QPilot supports staging sites in all its premium plans.
You can also use an alternative like WooCommerce’s official WooCommerce Subscriptions extension to enable WooCommerce recurring payments. Keep in mind, though, that WooCommerce Subscriptions mostly only brings recurring payments to your store and doesn’t help you deliver the kind of subscription experiences that Autoship Cloud does. Plus, you need to buy a lot of add-ons to get everything you need to sell subscribable goods. For instance, without an add-on like Follow-Ups, you can’t email your customers before their automatic subscription renewal payments happen. Check out this post on plugins for enabling WooCommerce recurring payments and subscriptions to understand how WooCommerce Subscriptions and other alternatives work.
The process you just saw for setting up WooCommerce recurring payments works for a wide array of businesses including B2B, B2C, or D2C ecommerce stores as well as services such as meal subscription boxes.
Should you use Autoship for recurring payments or simply enable subscriptions using other subscription plugins?
There are quite a few subscription plugins that bring WooCommerce recurring payments to your store. So why should you go with Autoship Cloud?
Autoship Cloud lets your users customize their subscriptions as needed.
Autoship Cloud gives your users full control over their subscriptions. Your users can edit their subscription plans (add or remove items as needed from their scheduled deliveries) all by themselves. They can also edit their delivery schedules.
For example, if you run a meal subscription service with Autoship Cloud, your users can easily switch their meal subscriptions or edit them (for example, downgrade from a 4-meals-per-week plan to a 2-meals-per-week plan). If your users only want to buy a one-time meal, that’s possible too. Your users can even subscribe to a meal plan and book a one-time meal, and use the same checkout for both.
And you have complete control over editing your scheduled orders and cycles via your admin area.
It fits in seamlessly with your current WooCommerce setup.
Once you set up a product to be an Autoship subscription product via Autoship Cloud’s plugin, Autoship Cloud adds the Subscribe and Save functionality to your product page and you can also easily add the upsell offer for an Autoship product on your cart/checkout page. The process is simple and straightforward.
Autoship Cloud supports several types of recurring payment models and sales tools.
Whether you’re a B2C store or a B2B supplier, you can set up highly customized subscription payment models using Autoship Cloud. From offering value-based discounts to setting up simple coupons or prorated billing, you get all the tools you need to deliver simple, flexible, and user-friendly subscription experiences to your regular or business customers.
Autoship Cloud also allows you to communicate with your subscribers through their entire subscription lifecycle, right from sending upcoming scheduled order summaries to reminding them of their upcoming automatic payments and posting failed payment notifications. This gives users the chance to pause or cancel if they need to.
You can use Autoship Cloud to offer discounts and offers, like free shipping. You can also combine discounts with free shipping.
Autoship Cloud works well with the email channel for boosting conversions, too. You can send your users emails for upselling and cross-selling products. With a single click, your users can add these products to their next scheduled deliveries.
Autoship Cloud is easy to set up.
You experienced first-hand in this post how easy it is to configure QPilot’s Autoship Cloud plugin. It can be live on your store within a day.
Also, Autoship Cloud’s technical team is here to support and guide you through the process.
If you need extra support, you can grab QPilot’s onboarding package and fast-track your implementation.
Autoship Cloud helps you make better data-driven business decisions.
Autoship Cloud offers thorough data reporting to help you make better inventory and marketing decisions.
You can use Autoship Cloud’s revenue dashboard to get high-level insights into your business’s health, like your recurring revenue.
Also, you can instantly sort your scheduled orders to spot the ones up for delivery. This helps you check stock status and ensure deliverability.
Not only that, but Autoship Cloud also helps with inventory forecasting, so you can always fulfill your orders and keep shipping on time. Reporting on your most popular subscriptions is one way to maintain adequate inventories.
Moreover, you can filter your customer base to find which customers have bought a particular product. This helps you run targeted upselling and cross-selling campaigns.
You can use Autoship Cloud’s data to calculate your other business metrics, like your customers’ average lifetime value, among others.
Event logs are another handy feature — they’re like a timeline tracking every event during a subscription lifecycle.
Wrapping it up…
When you’re looking to set up WooCommerce recurring payments on your B2C store or your B2B supplies website, you’re essentially expecting to sell your regular WooCommerce products as product subscriptions. And as you just saw, recurring payments are merely one of the many moving parts of a subscription business. So you want more than just the ability to set up recurring billing schedules.
Unlike other WooCommerce subscription plugins that mostly only focus on enabling WooCommerce recurring payments, Autoship Cloud comes with functionalities to deal with every aspect of your subscription business. It brings end-to-end subscription management to your WooCommerce store and lets you ship your products and supplies without any hassle.
Sign up for a free trial of Autoship Cloud and see how easy it is to accept WooCommerce recurring payments on your store and run a subscription business on autopilot.
Accept recurring payments on your WooCommerce store with Autoship Cloud
Bring end-to-end subscription management to your WooCommerce store with Autoship Cloud, the most complete WooCommerce subscription plugin. It comes with everything — right from recurring order management to (automatic) recurring billing and payment processing — you need to sell subscriptions on your store.
Explore related to Tutorials