Recurring Orders Are Great for Sales
And That’s Why We ♥ Autoship!
Our plugin manages multiple integrations & payments to enable a great Auto-Ship experience for your WooCommerce store. Plus we’re always cooking up new features to make it a great sales tool.
WordPress Plugin Created by Patterns In the Cloud
Add Any Item to the Cart: Normal Checkout
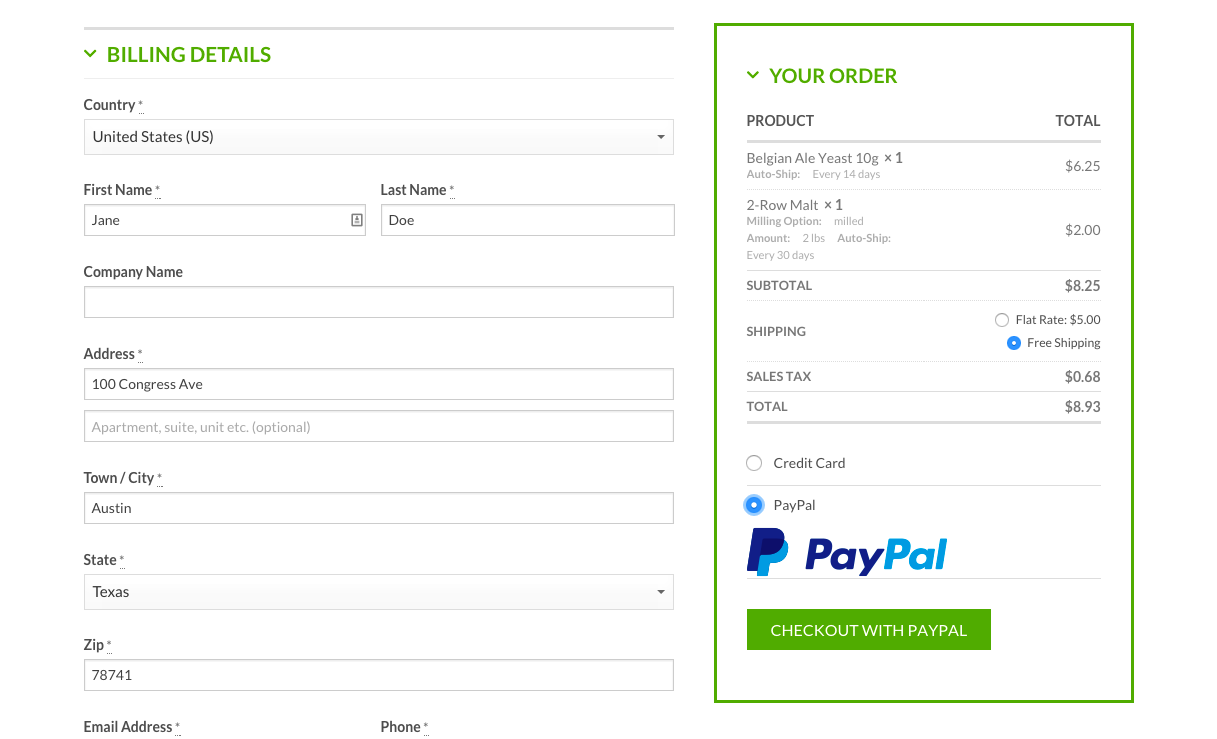
Enable your customers to add any product to the cart, whether on auto-ship or not, and complete a normal checkout process. One-time purchases are completed and any items selected for Auto-Ship are immediately added to their next upcoming order.
Customers Can Manage Upcoming Orders in My Account
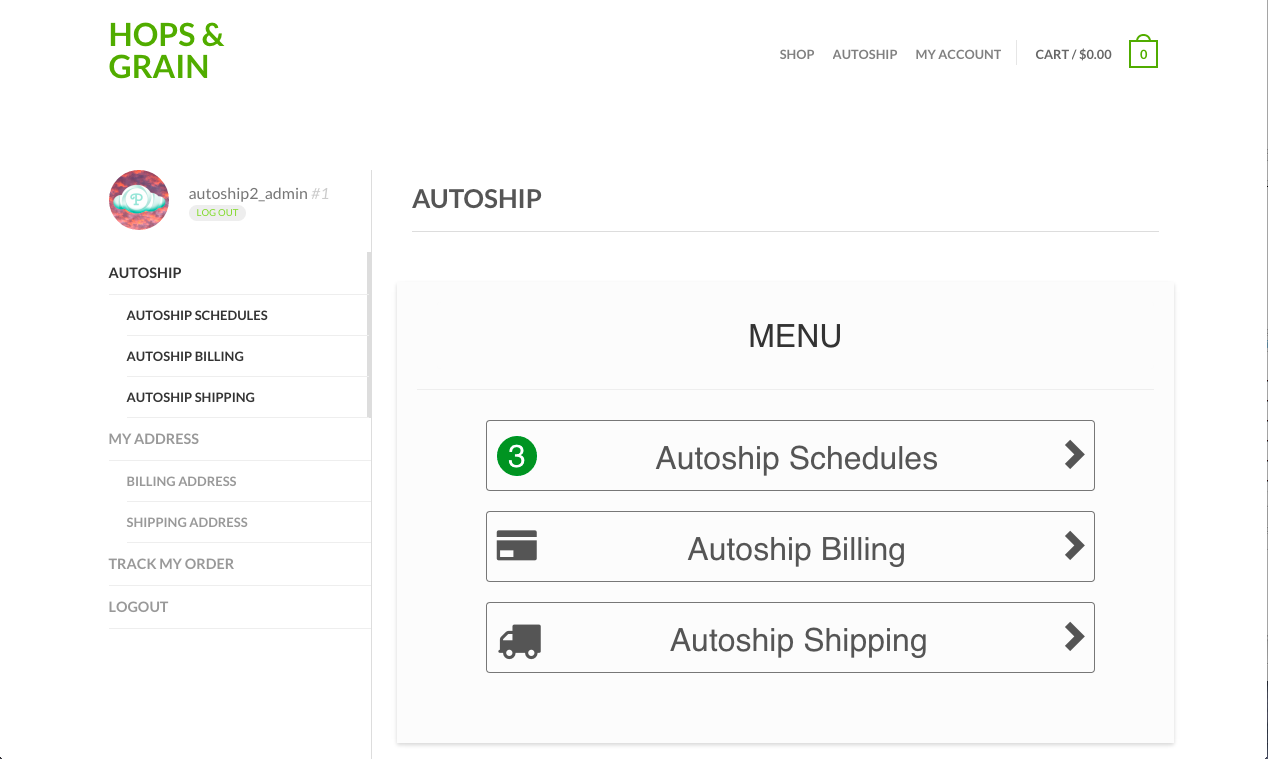
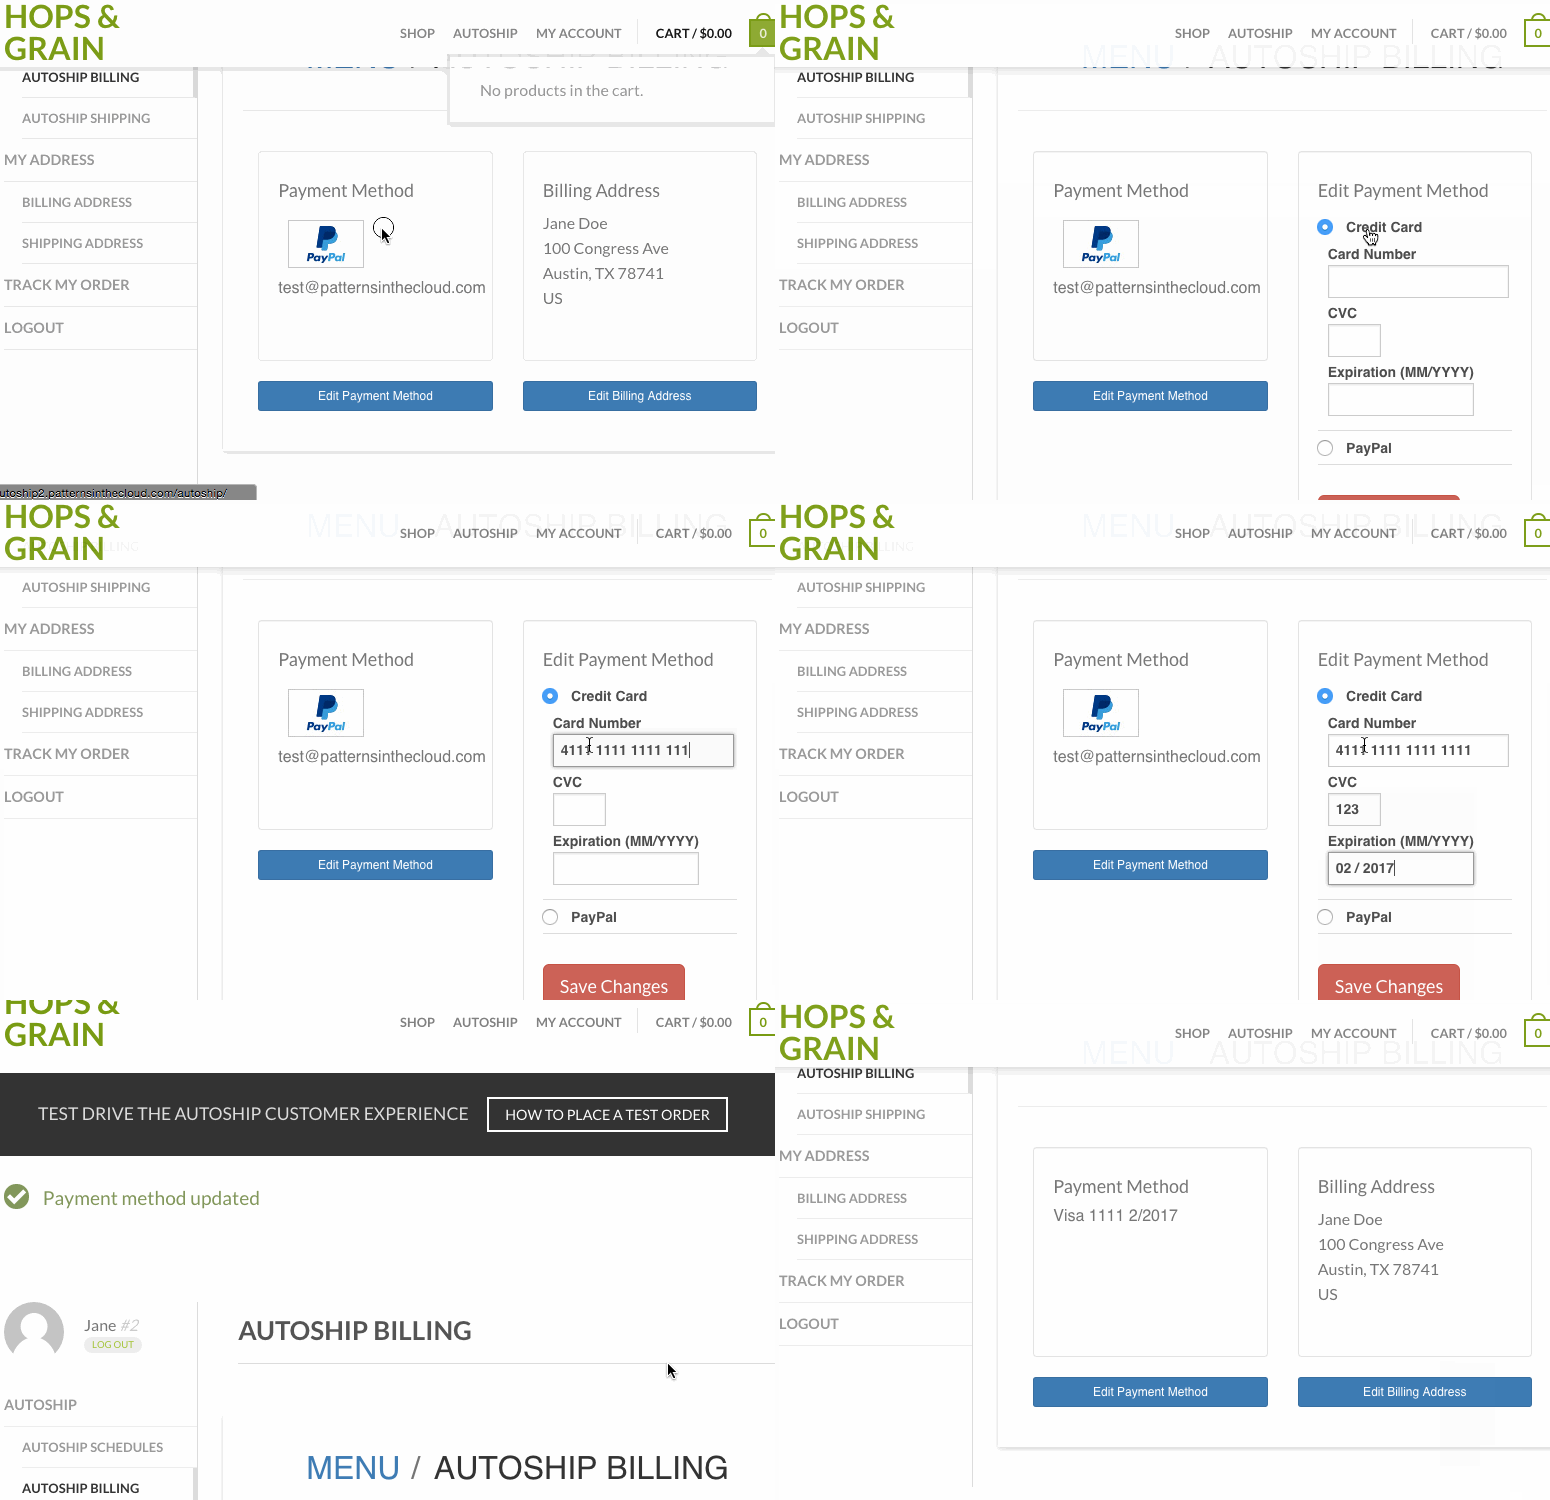
Once a customer has completed a checkout with items on Auto-Ship, they can immediately manage their upcoming orders securely in the My Account page. New Autoship features are now displayed on pages via shortcodes just like WooCommerce pages.
Supports Simple and Variable Products
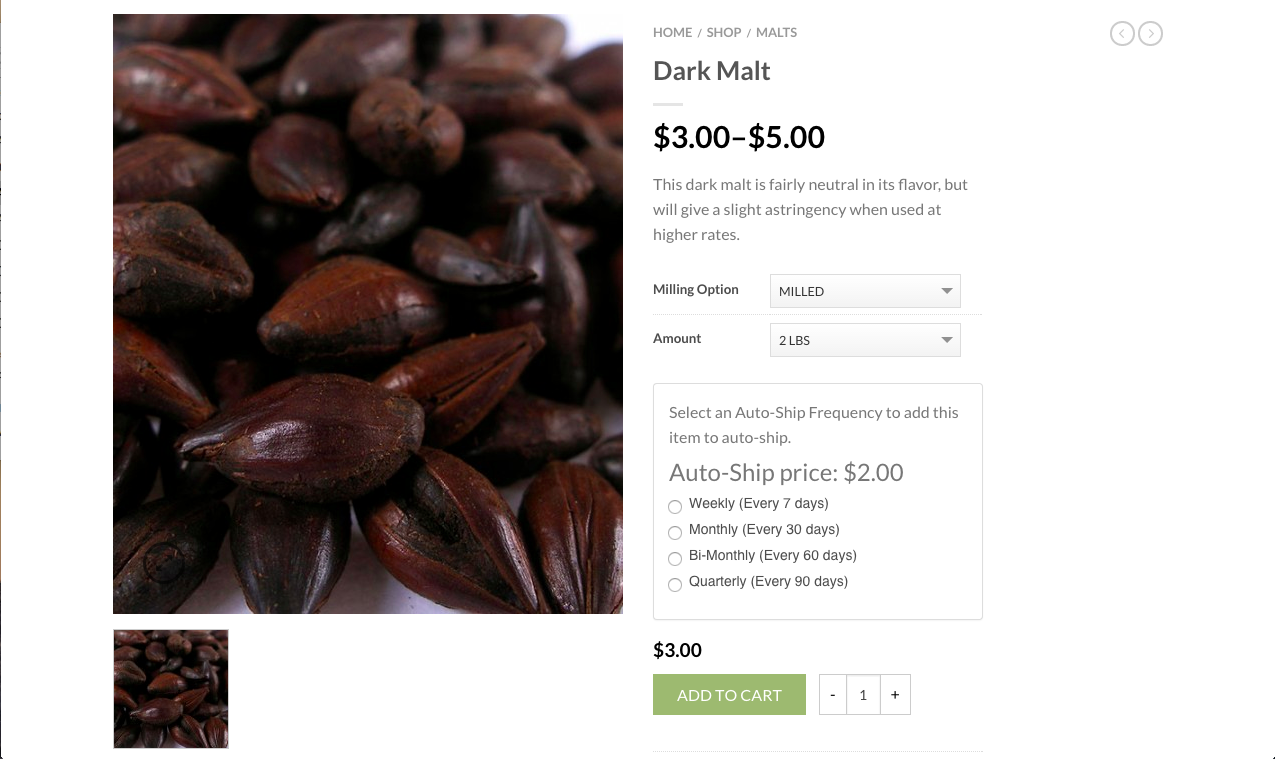
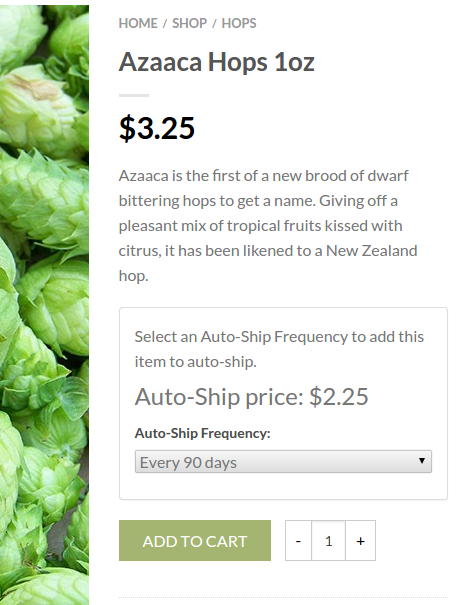
All of your store’s products can be added to Auto-Ship: even variable products. If you have products available in different variants, they are displayed individually in the My Auto-Ship manager to your customers. New Autoship options can now be set per-product. Decide which products customers can autoship, how many schedules each product displays and even set a separate Autoship price to incentive your customers.
Top Features of WC Auto-Ship
See the features that make WC Auto-Ship a complete solution for WooCommerce.
New In 3.1+ Autoship Reports & Customer Management
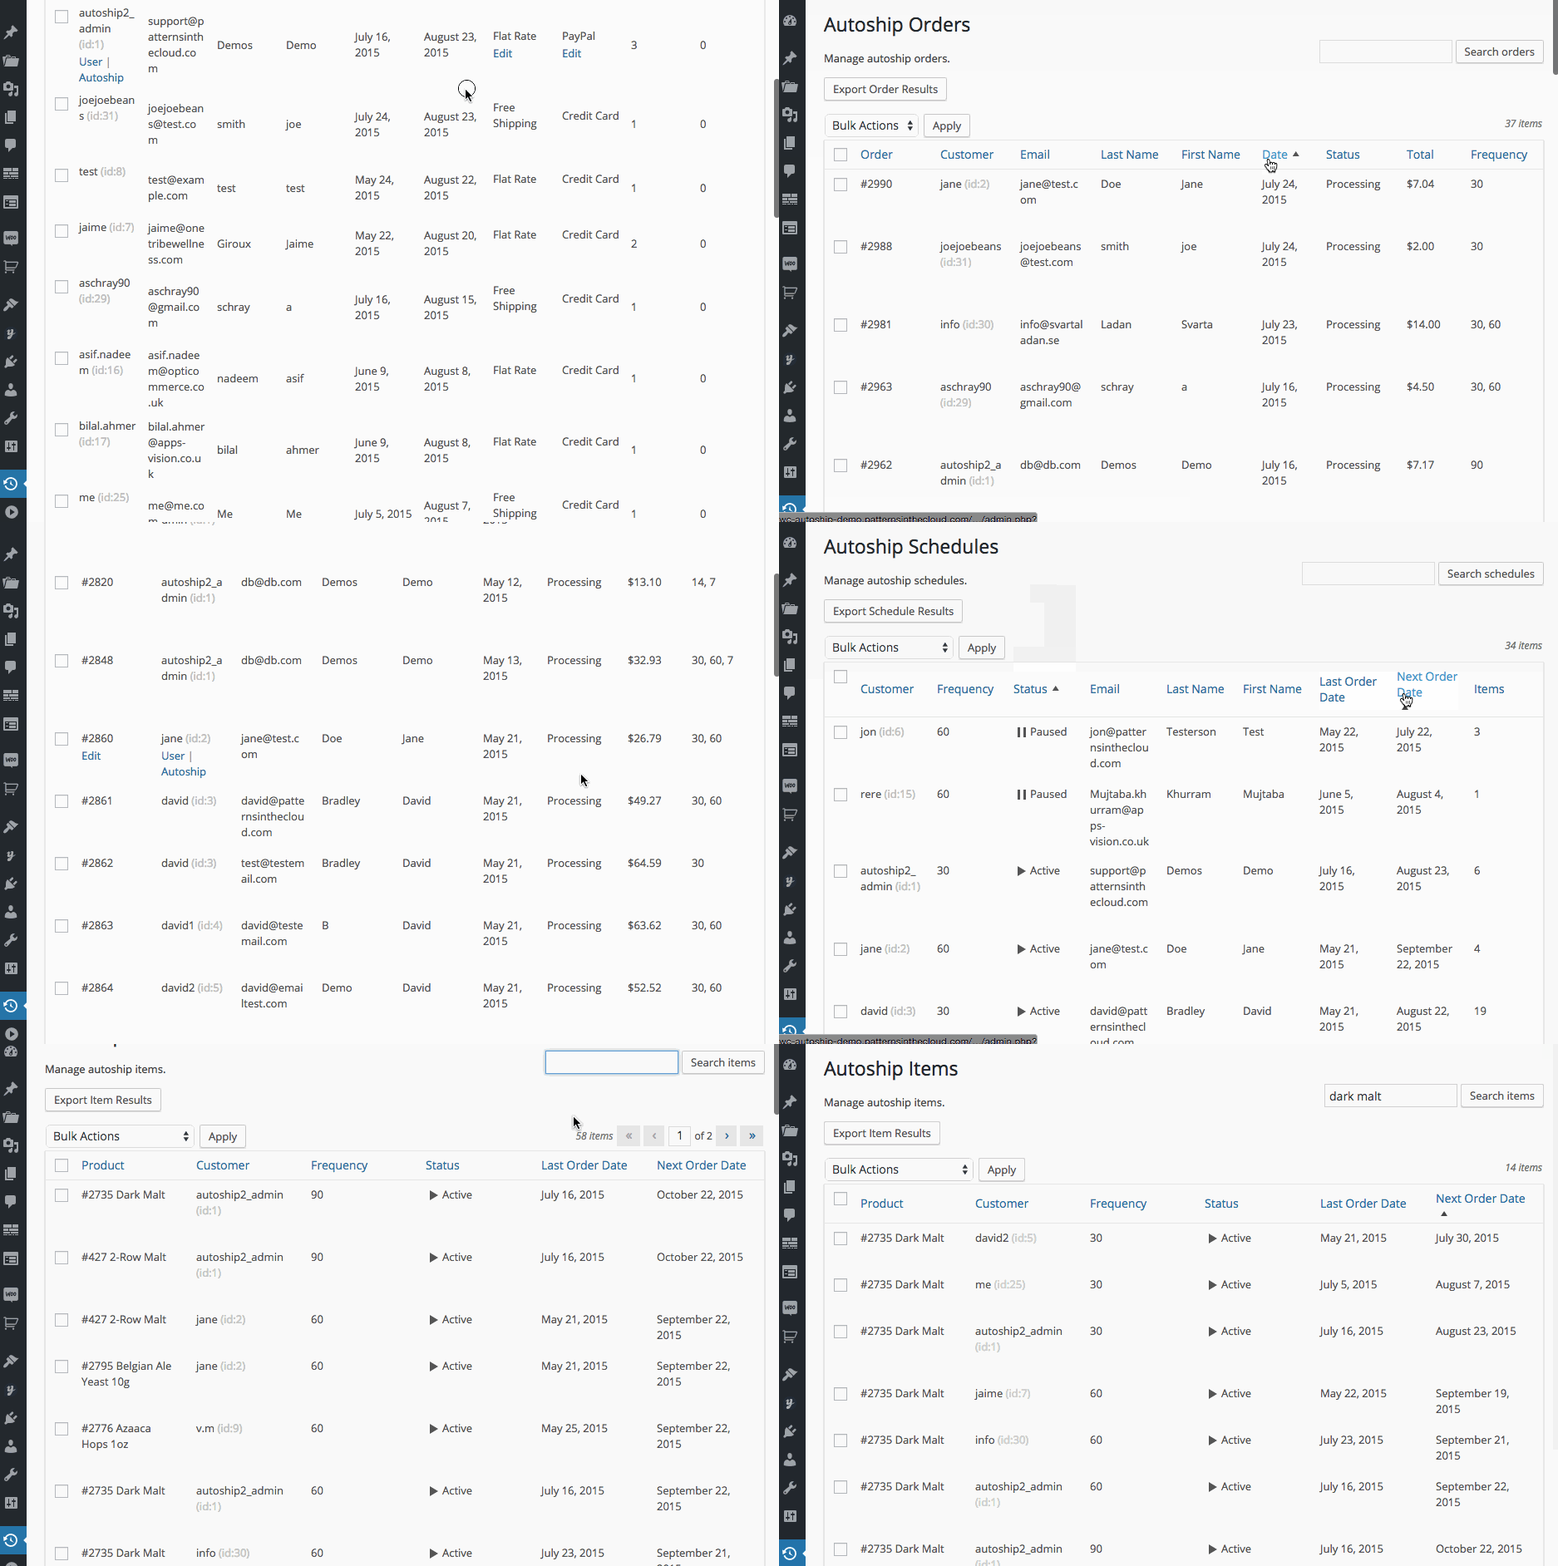
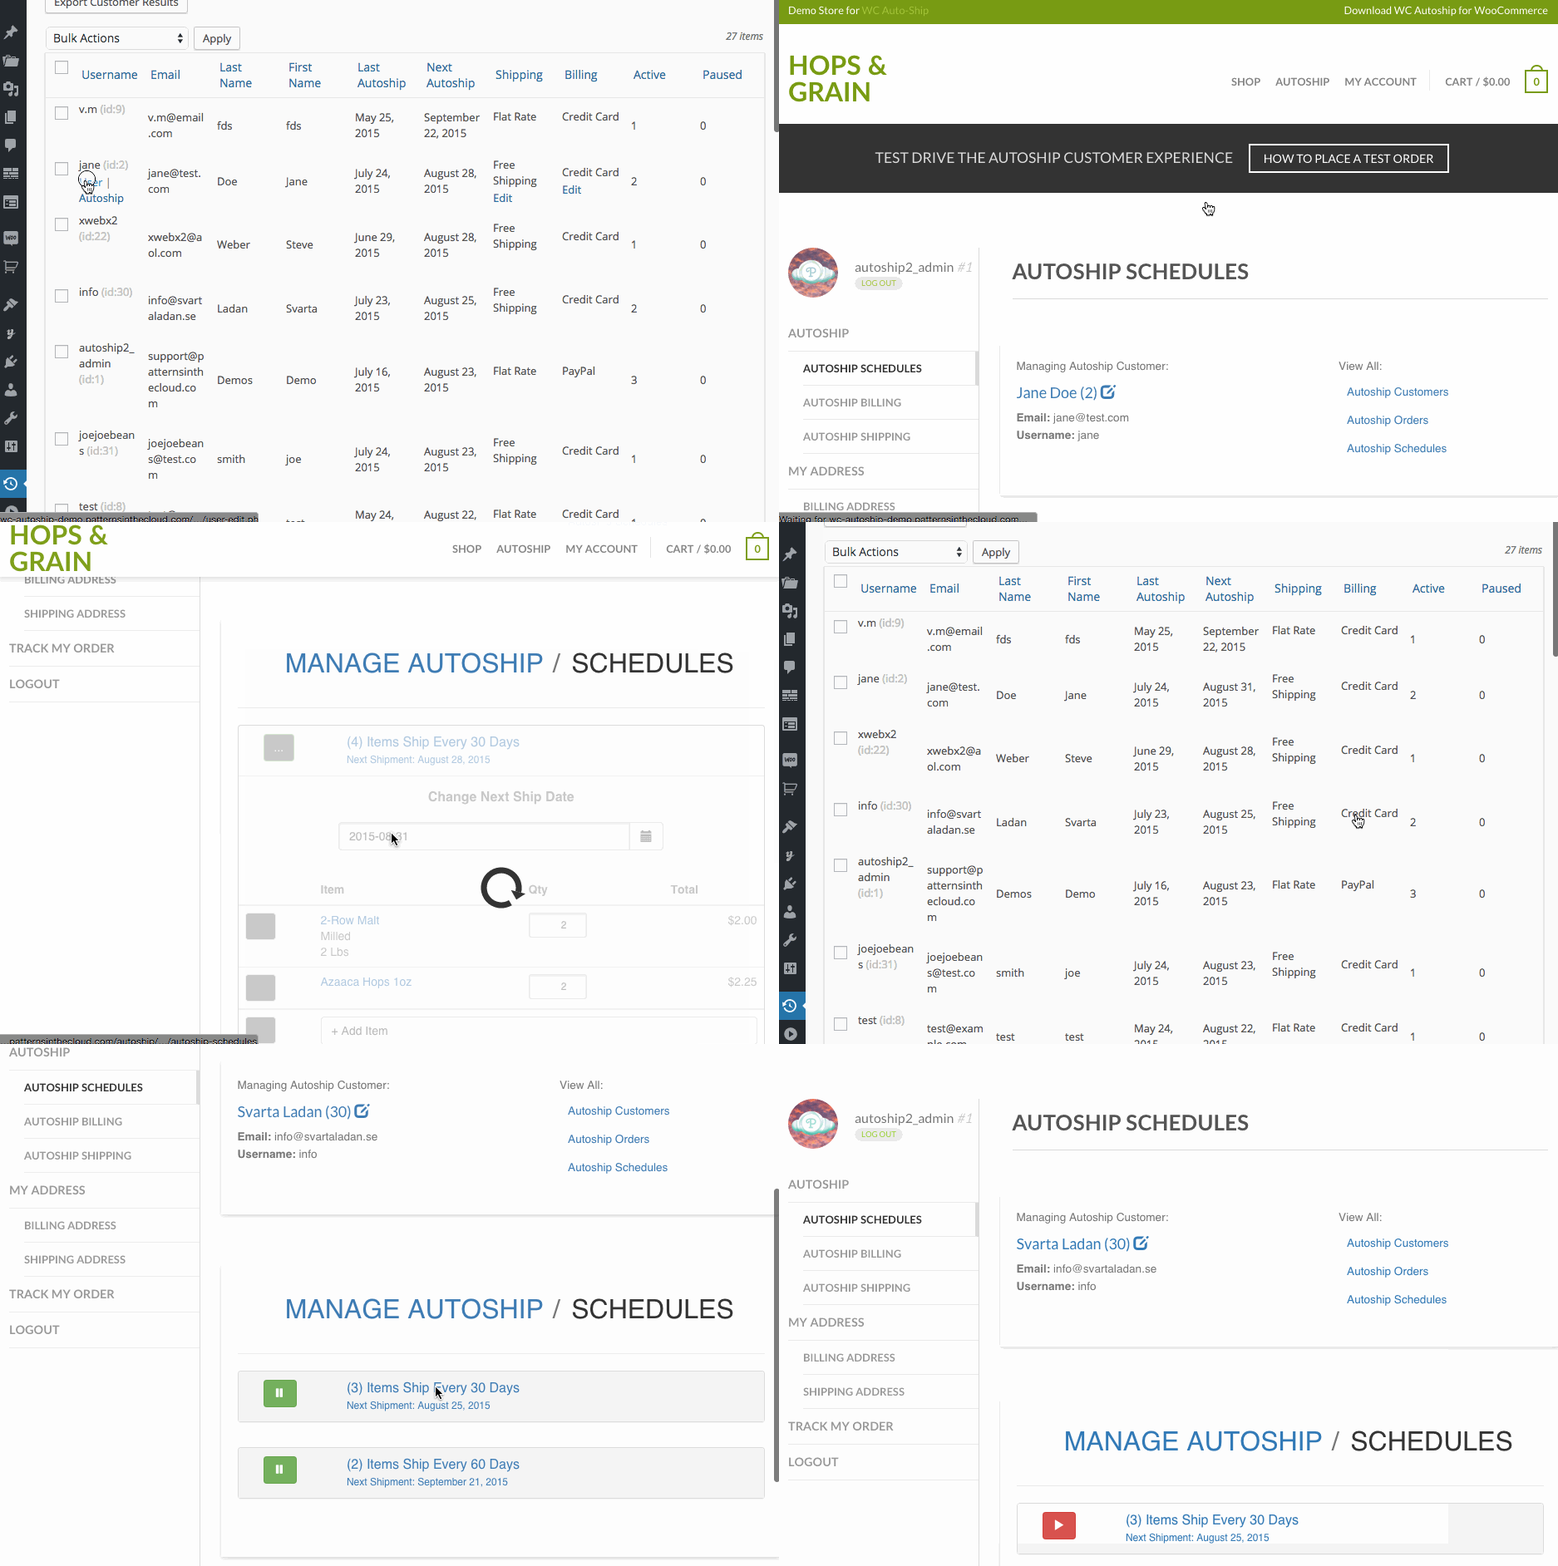
Fully manage your Autoship customers with reports and customer support workflows. Site Admins can view/search/export reports on Autoship Orders, Schedules, Items and Customers to better manage Autoship customer and item data. Simply click on a customer within any report to access their Autoship orders within ‘My Account’ as a customer support workflow.
Fully Supports WooCommerce
Your WooCommerce store’s Products, Customers, Shipping Options, Taxes and Checkout are all supported by WC Auto-Ship. After enabling the Auto-Ship plugin, you’ll see Auto-Ship options available on all of your product pages and all of your products, shipping options and taxes showing up accurately in the My Auto-Ship manager.
Extends WooCommerce Email Notifications
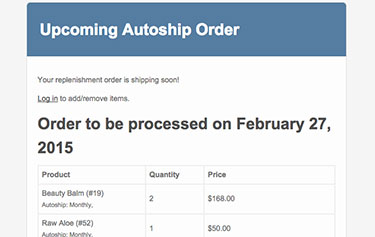
Four additional email notifications are added to the WooCommerce email templates. You can choose to enable and customize any of the following email templates the same way you would any WooCommerce order email template: Upcoming Auto-Ship (10-Day Notice) | Upcoming Auto-Ship (Next-Day Notice) | Auto-Ship Payment Status Notice | Auto-Ship Updated Notice
Enable Multiple Auto-Ship Payment Gateways
WC Auto-Ship allows store owners to install and use multiple WC Auto-Ship payment gateways at the same time. Offer your customers more payment options to help them maintain their orders.
Override Templates for Customization
Override any of the WC Auto-Ship template files to implement your own design and behaviors. Check out our code samples in the Add-Ons tab.
Getting Started
Follow these helpful steps when starting fresh with installing and setting up WC Auto-Ship on your WooCommerce store. We also recommend watching the walkthrough video below and referring to the documentation included with your downloaded plugin (readme.pdf).
First: Verify That Your WooCommerce Store is Working Properly
- Confirm that WooCommerce 2.3.x (or a more recent version) is installed, activated and working on your site.
- Make sure that you have installed and activated a WordPress theme that is compatible with WooCommerce.
- Review all of your WooCommerce Settings and Products. WC Auto-Ship will display your existing (and future) products, shipping methods, taxes, etc, so it’s a good idea to make sure these items and settings are already properly configured for your store before installing WC Auto-Ship.
Next: Download, Install and Activate WC Auto-Ship
- Download the plugin (woocommerce-autoship-3.x.zip) that you purchased from WooAutoship.com
- From your WordPress admin menu, find Plugins and click ‘Add New’
- On the ‘Add Plugins’ page, click ‘Upload Plugin’
- Upload your downloaded plugin (woocommerce-auto-ship-3.x.zip)
- Once the upload is complete, click ‘Activate’ to enable WC Auto-Ship
Next: Activate Your WC Auto-Ship License Key
Your license key for WC Auto-Ship can be found in your order confirmation email or in your My Account page on WooAutoship.com. Activating your license is the best way to ensure you are able to receive updates to your WC Auto-Ship installation.
- In your WordPress Admin, go to WooCommerce > Settings > WC Auto-Ship (tab)
- Copy your license key (from the email or My Account page) to the License Key field in your WordPress admin, and click “save changes”.
Next: Review and Update WC Auto-Ship Settings In WooCommerce
Now that your license is activated, you should take a few minutes to review the Autoship Settings page, Email Notifications and new options added to your WooCommerce Settings and Products.
General Autoship Settings
In your WooCommerce Settings, click on the tab ‘WC Auto-Ship’ to review general Autoship Settings
- License Key: If you haven’t already copied your license key for WC Auto-ship, please do so now.
- Autoship Pages: The Autoship customer experience is displayed on pages via shortcodes (just like WooCommerce pages). Make sure that each Autoship page has been assigned.
- No Autoship Message: This is a custom message to display for customers with no autoship schedules. This is recommended as customers can only enable Autoship schedules by checking out on your webstore with Autoship items in their cart.
- Management page message (HTML): (Optional) Any text or html entered into this field will display above your customer’s “Autoship Menu” on the “Autoship” page of your website. This is useful if you have a message or notice that you’d like to share with all of your Auto-Ship customers.
NEW Per-Product Autoship Settings
Version 3+ allows you to control Autoship options per-product. These options & settings can be found at Products » Product Data » Auto-Ship- Enable Auto-Ship Check this option to enable Auto-Ship. Leave blank to not offer Auto-ship for a product.
- Auto-Ship Price: (Optional) Enter a separate price to incentivize customers who select an Auto-Ship schedule. This is similar in function to entering a “sale” price.
- Variable Products: Set the Auto-Ship Price per variation.
- Set Auto-Ship Frequencies
- Min Auto-Ship Frequency: Set the minimum amount of days that you would like your customers to be able to schedule Auto-Ship orders.
- Max Auto-Ship Frequency: Set the maximum amount of days that you would like your customers to be able to schedule Auto-Ship orders.
- Pro-Tip: Use our template override add-ons to filter and display Auto-Ship Frequencies on your product pages.
WooCommerce Email Settings
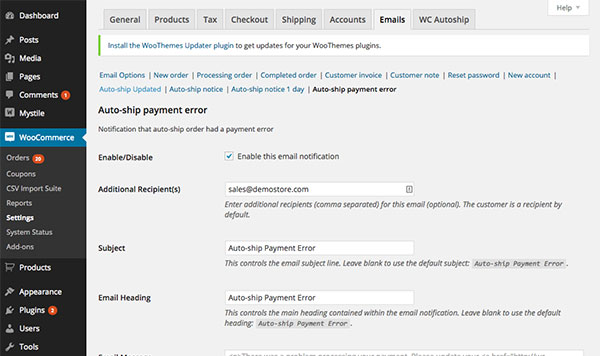
WC Auto-Ship adds 4 additional WooCommerce Emails to WooCommerce > Settings > Emails (tab) that are useful for notifying customers about upcoming Auto-Ship orders and payment statuses. By default, all Auto-Ship emails will be enabled, so you can simply disable the ones you don’t want to use.
- Auto-Ship Updated: Notifies the customer that an auto-ship order has been updated (Sent 30 minutes after updates are saved by the customer)
- Auto-Ship Notice: Notification that an upcoming auto-ship order will be processed soon (10 days).
- Auto-Ship 1-Day Notice: Notification that an upcoming auto-ship will be processed in 1 day.
- Auto-Ship Payment Error: Notifies the customer that an auto-ship order had a payment error, that the order has been paused and prompts them to login to My Account and update their payment information to re-activate their auto-ship.
Feel free to customize the avavilable fields on any of these emails.
Pro Tip: Some companies add a customer support email as an additional recipient to payment status emails, so that they can best support their auto-ship customers. All Auto-Ship email templates provide this option for you to utilize as-desired.
WooCommerce Checkout Settings
WC Auto-Ship requires its own payment gateway integrations to successfully support WooCommerce checkout and create Auto-Ship transactions. Just like other WooCommerce payment gateways, you’ll be adding your WC Auto-Ship payment gateway to WooCommerce > Settings > Checkout (tab). You can install and activate more than 1 WC Auto-Ship payment gateway at a time.
Last Step: Install and Activate a WC Auto-Ship Payment Gateway
You must install and activate a WC Auto-Ship Payment Gateway before you can successfully accept orders and run WC Auto-Ship on your store.
Want to develop your own payment gateway integration? WC Auto-Ship comes with a fully documented API so that you can develop your own payment gateway integration. Contact us if you’d like to review this documentation yourself.
Step 1: Download and Install a WC Auto-Ship Payment Gateway Plugin
- Download a WC Auto-Ship Payment Gateway plugin from WooAutoship.com
- If you have a PayPal business account, then you can begin with the WC Auto-Ship PayPal Payments plugin that is included with your WC Auto-Ship download. Click here to learn more about integrating PayPal Express Checkout with WC Auto-Ship.
- Upload and activate the plugin via your WordPress Admin > Plugins > Add New > Upload Plugin
Step 2: Enable and Setup A WC Auto-Ship Payment Gateway
- In WooCommerce > Settings > Checkout (tab), find your WC Auto-Ship Payment Gateway and click on “Settings”
- WC Auto-Ship Payment Gateways all have a Gateway ID that begins with “wc_autoship_”
- On the settings page for your WC Auto-Ship Payment Gateway, check “Enable” and complete your gateway setup by following the documentation included with your download.
Auto-Ship Pre-Launch to Post-Launch Checklist:
Use this helpful checklist to make your Auto-Ship launch smooth and keep your orders turning!
- Pre-Launch: Did you run a successful test transaction?
- Pre-Launch: Are the correct payment gateways displayed at WooCommerce checkout?
- Pre-Launch: Are WooCommerce emails being delivered?
- Pre-Launch: Are there any shipping discounts, coupons or plugins setup that could impact Auto-Ship orders?
- Pre-Launch: Are the Auto-Ship Menu and pages displaying nicely in the My Account page?
- Launch: Did you run a successful live transaction?
- Post-Launch: How is WordPress hosting performing? Should I consider an increase in memory limit?
F.A.Q.’s
Frequently asked questions about WC Auto-Ship.Can Normal (non auto-ship) Products Be Added to the Same Cart/Checkout?
Yes! Your customers can add any product from your WooCommerce store to the same cart and checkout. Only the items that are purchased with Auto-Ship options selected are used to create Auto-Ship orders. Customers complete their checkout just as they would a normal WooCommerce checkout.
Are All Products Available to Customers for Auto-Ship?
Yes! Any product that customers can purchase from your WooCommerce store are available for Auto-Ship. Variable products are displayed as separate line items in the My Auto-Ship manager.
Note: We are currently working on a feature update that will enable you to select only the products that you want to enable Auto-Ship for.
Note: You can enable/disable Autoship options for any product as of Version 3!
Can I Change How the Auto-Ship Options Look On My Website and Product Pages?
Yes! As of version 2.0, you can override any of the standard WC Auto-Ship templates. Please visit page 4 of the Readme.PDF
Why Do I Need A WC Auto-Ship Payment Gateway?
In order for WC Auto-Ship to properly automate future recurring payments for Auto-Ship orders, additional features must be integrated with the payment gateway. Other payment gateway integrations for WooCommerce do not include these features.
What Kind of Support Do You Provide?
It’s our mission to ensure that you are able to successfully install, run and maintain your store. Your download comes with a license that gives you access to support and updates for 1 year. We offer support to licensed customers via the Support Forums on our website and, of course, email. We are always happy to support issues you may experience setting up or updating WC Auto-Ship, but are limited in the amount of support we can provide on WordPress/WooCommerce themes and other 3rd party plugins. We always recommend that if you get support directly from your theme or plugin author if you are experiencing issues with your theme.
Will WC Auto-Ship Work With My WordPress Theme?
If your theme is working properly with WooCommerce, then it is very likely it will work. Sometimes there are small issues when a theme is using an older version of jQuery or if the theme has an irregular My Account page, but we’ve seen many stores setup WC Auto-Ship quickly and successfully.
I Have Special Needs for Auto-Ship. Will You Create Them For Me?
Please get in touch with us about any special needs you have for Auto-Ship. If it’s not urgent, we can consider it as a possible feature in a future version update. Sometimes, we’re already developing them!
If you need something custom developed for your site or need extra help, see our Autoship Services page.
Payment Gateway API Integrations
WC Auto-Ship includes an API for developers to build their own integrations with payment gateways.
Use the form below to get in touch if you are:
- A Developer in need of API documentation
- A Store Owner in need of an integration
BONUS We offer incentives to developers and store owners who are involved with new payment gateways, so let us know if you’re interested!
Payment Gateway Enquiry
Official Theme Add-onsWC AUTO-SHIP VERSION 3 OR HIGHER
WC Auto-Ship allows the current theme to override any template located in the main plugin folder at woocommerce-autoship/templates. We understand that every WC Auto-Ship site is unique, so we have created theme add-ons to help you choose your style.
Implementing a theme add-on is easy:
- Copy the folder “woocommerce-autoship” to “wp-content/themes/[your-theme]/woocommerce-autoship”
- OPTIONAL: Edit the template files in “wp-content/themes/[your-theme]/woocommerce-autoship” to suit your precise design or behaviors
- Confirm that you’ve update the template for a simple product or variable product.
- You will see the new template overrides on the site when you navigate to the product page.
Click here to see this process demonstrated on YouTube.
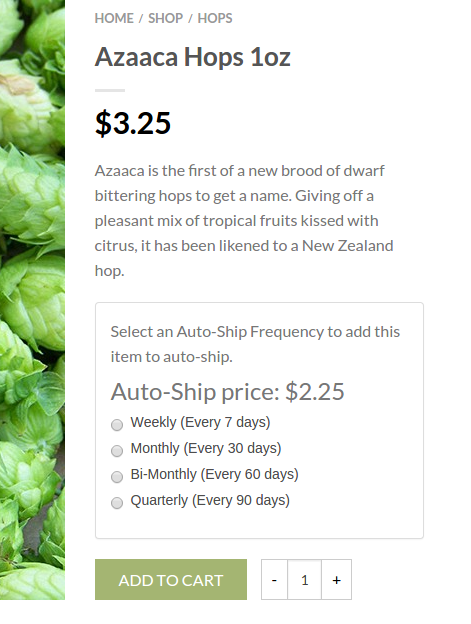
Product Page Radio Buttons
Override the default display of Autoship Frequencies with radio buttons and specific frequencies to the product page. Includes separate templates for simple and variable products.
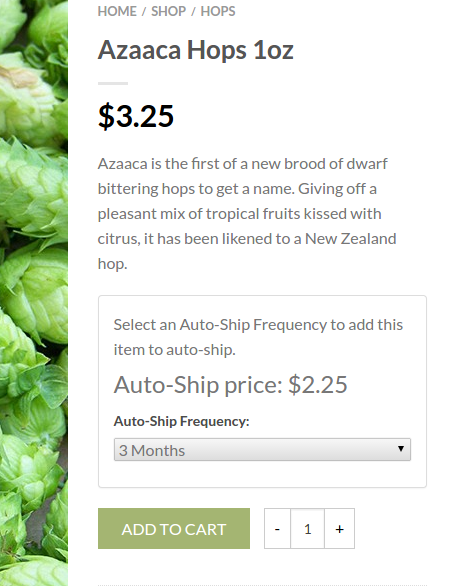
Product Page Select Box
Override the default display of Autoship Frequencies with a select dropdown and specific frequencies to the product page. Includes separate templates for simple and variable products.


