
Customizing the look and feel of shop features is a super-power of WooCommerce that online stores leverage to help maximize conversions, create cohesion, and make your shop as user friendly and well designed as possible is a constant need.
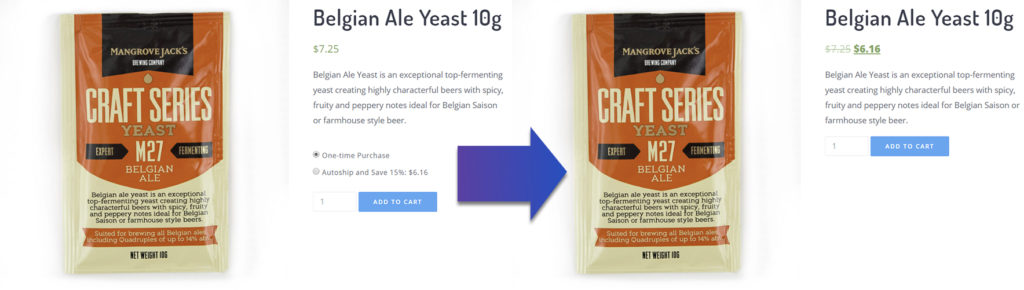
One of the requests that our team gets a lot from merchants is for help customizing the Autoship Schedule Options that are displayed on the Product pages in WooCommerce: particularly converting the options from a Radio & Select “drop-down” to “radio” options or “buttons”.
With that goal in mind, we thought this would be a great example to share as a tutorial!
Getting Ready To Customize!
When it comes to customizing anything in WordPress, be it a Theme like Storefront or Flatsome, or a Plugin like WooCommerce or Autoship Cloud, a first step should always be to create a child theme. Creating a child theme and making your changes either through the functions.php file in the child theme or through overriding template files in the child theme allows you to change aspects of your site’s appearance yet still preserve your theme’s look and functionality and prevent your changes from being lost when your theme and/or plugins are updated.
What we’ll be doing!
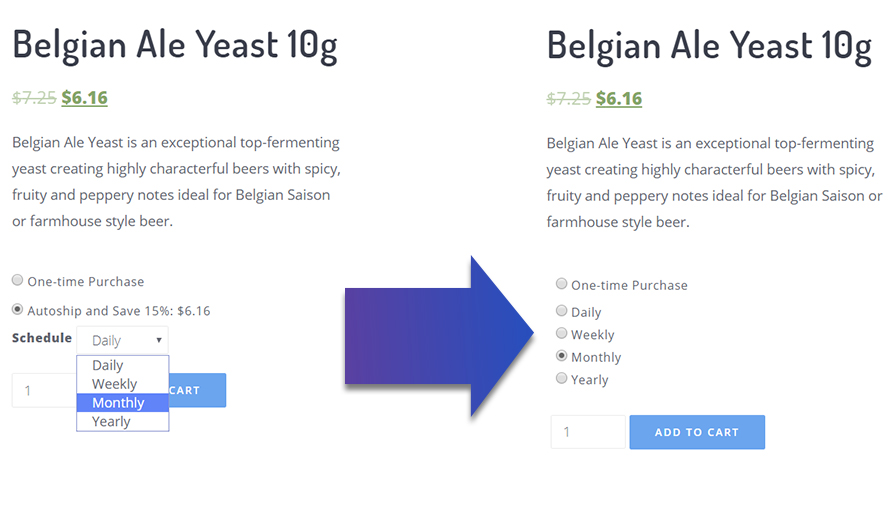
In this tutorial we’ll be changing the default Autoship Schedule Options from the out of the box layout to a custom radio only layout ( Seen Below in the working product ) allowing customers to Autoship products and select the Scheduled Order frequency with a single click.
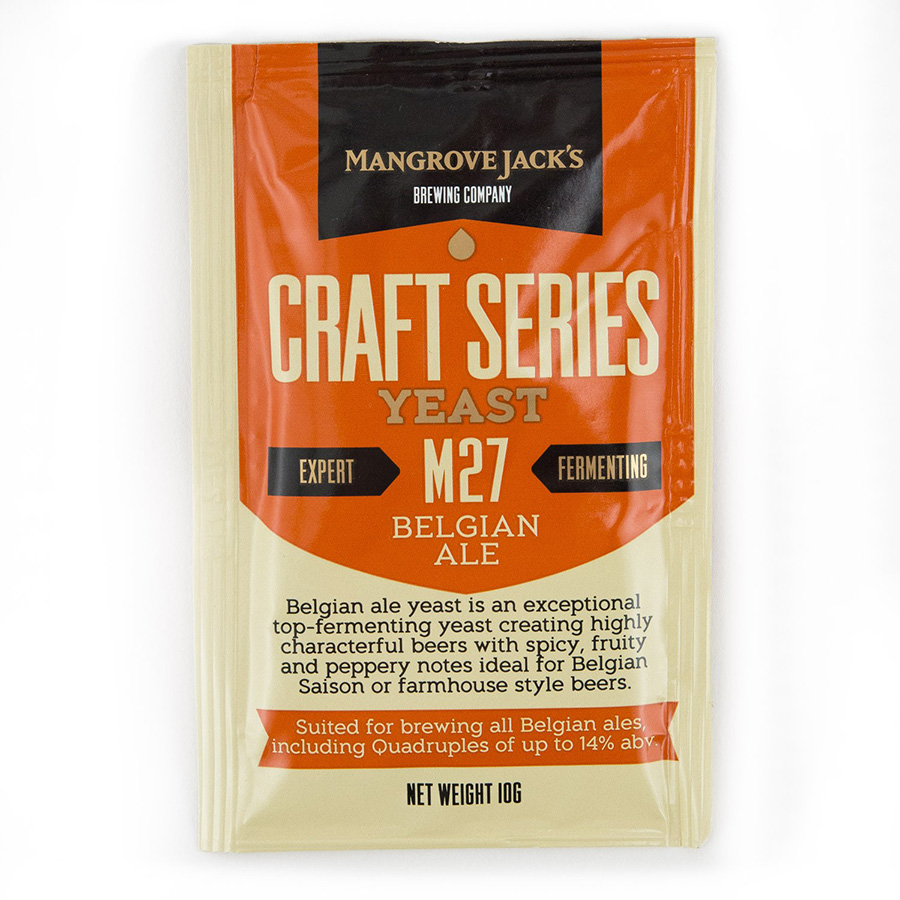
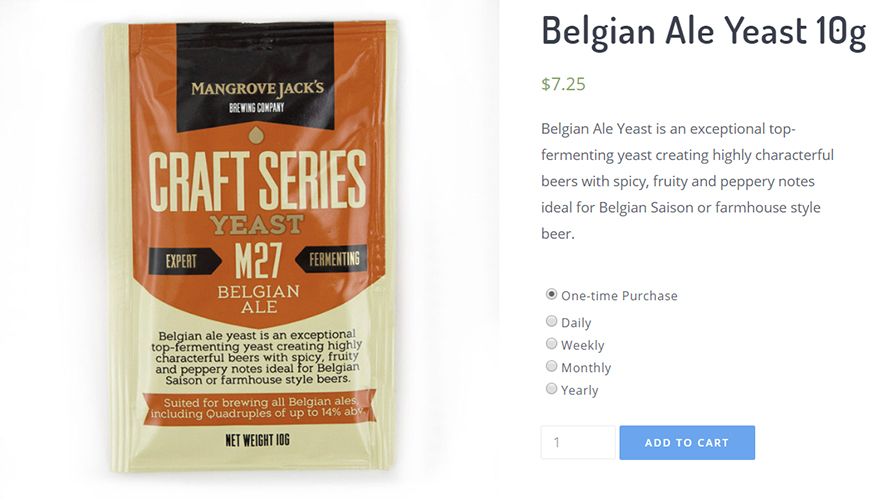
Belgian Ale Yeast 10g
$7.25
Belgian Ale Yeast is an exceptional top-fermenting yeast creating highly characterful beers with spicy, fruity and peppery notes ideal for Belgian Saison or farmhouse style beer.
Our Approach!
Autoship Cloud has been created to be extremely customizable with extensive actions, filters, and template files that can all be used to customize and extend the functionality in seemingly unlimited ways. While we could duplicate the Autoship Cloud plugin template files for the product page and make our changes in the copy directly we’ll be instead using the built in action hooks found in those same templates.
If you’re making extensive layout and structural changes to the functionality, making changes in copies of the template files might be a better approach.
Step 1: Hide the existing options
The first step is to add the following CSS rules to your child theme’s styles sheet to hide the out of the box Autoship options. It’s important to note that we’re hiding these options rather than removing them. This will be explained later but for now just know that while they will be hidden we’re still going to use them.
Step 2: Hooking into the Autoship template Action
Since we’re adding custom HTML using a existing Autoship Cloud actions we first need to add our add_action calls to our functions.php file to include our custom function as a callback. If you’re unfamiliar with how to use WordPress actions and filters you can learn more here.
Let’s use the autoship_before_schedule_options and the autoship_before_schedule_options_variable action hooks as well as a custom function named xx_display_autoship_radio_options to hook into the template files and output our custom HTML. See more about Autoship Cloud Hooks and Actions here
Step 3: Creating the Callback Function
Now that we’ve hooked into the Autoship Cloud actions we need to create the function xx_display_autoship_radio_options we referenced in the callback to our functions.php file.
Looking at the actions in the Autoship Cloud schedule-options.php and schedule-options-variable.php we see that they both supply the WooCommerce product as the first parameter, which we’ll be using later to pull and output the Autoship Cloud Cchedule Options.
Step 4: Populating our Function
Now we need to add the custom code that will output the custom layout. To do this we’re going to use the autoship_product_frequency_options() function. The function takes the WooCommerce product and returns an array of Autoship Schedule options for the supplied product ( frequency type, frequency, and display name ).
First, add the html to output the One-time Purchase radio option. Keep note that we’re going to be assigning these options a custom “autoship-radio-option” class for future use in the script code.
Secondly, add the html to output the Autoship Frequency Options for this product each as a separate radio button. To do this we’re going to loop through the array returned by the autoship_product_frequency_options() function and output a radio HTML element for each record.
note: we wrapped all the frequency radio options in a custom div since we’re going to customize those as a group later.
Step 5: Applying the new options when clicked by a customer
We’ve hidden the out-of-the-box html, added our own html but now we need our new html options to actually add the selected radio option frequency to the current product.
In Step 1 above we hid the existing options rather than remove them completely. The reason for this is so we can trigger them via jQuery based on the new option selected. This a) allows us to let Autoship Cloud deal with adding the options to the product as well as displaying any discounted prices and b) allows for easier maintenance down the road.
Create a new schedule-options.js file and add the following code to it.
What this jQuery code does is when a click event is triggered on one or our new radio buttons ( note the reference to our custom class autoship-radio-option ) it fires our custom triggerAutoshipChange function.
The triggerAutoshipChange function first finds all the Autoship Cloud components associated with the option clicked on. To do this we’re going to use the global Autoship Cloud autoshipTemplateData data object which stores the classes and components uses on the site. This could be done manually but that would be more work and could break if classes and elements change on the template.
After finding the various Autoship Cloud elements for the selected product, the triggerAutoshipChange function then checks if the customer is clicking a radio option with a value or not ( no value means they are choosing the One-time Purchase option else they are selecting a Frequency option ).
Based on the option the customer selects we’re selecting and triggering a click on the existing hidden Autoship Cloud Frequency options.
Final Step ( optional ): Add some design flair & a Discount Offer!
The last and optional step is to add back the Autoship and Save discount string ( we should always entice our customers, right? ) and some eye appeal to our new layout ( hey, why customize and not add style? ).
Another great thing about the Autoship Cloud plugin are all the pre-build functions we can use with our customization. One of those is the autoship_checkout_recurring_discount_string() function which will output the Autoship savings offer when a customer will save money either at checkout or on their recurring orders. This function makes it easy to add that catch to our template. We would add the following to our html output, directly before our radio options.
Add the following to our child theme’s style sheet.
Result & Live Demo Here!
Belgian Ale Yeast 10g
$7.25
Belgian Ale Yeast is an exceptional top-fermenting yeast creating highly characterful beers with spicy, fruity and peppery notes ideal for Belgian Saison or farmhouse style beer.